Category Archives: DIY

Summer Skin Care Tips & Home Remedies, Indian Beauty Blog, Indian Skincare Blog

Summer Skin Care Tips & Home Remedies

Summer Skin Care Tips & Home Remedies

By Rashmi

Hello lovelies,

Summers are back and with a bang. Nobody likes summers as they bring with them innumerable skin woes. But don’t you people worry. I have got it all covered for you people with easy solutions to keep your skin fresh and glowing. Thank me later

1. SUNSCREEN –

Use sunscreen whenever you are going out and make sure it is at least SPF 30 or choose from what suits you. Sunscreens protect your skin from harmful UV rays and prevent it from getting damaged.

2. CLEANSER –

The cleanser helps to unclog pores and it should be used as a part of a skincare regimen. During summers it becomes even more important to use a cleanser as the skin becomes lifeless and the pores get clogged. Make your own cleanser by mixing yogurt and honey. Apply it on your face and let it stay for 20 minutes and then wash it off to get clear skin.

3. EXFOLIATE –

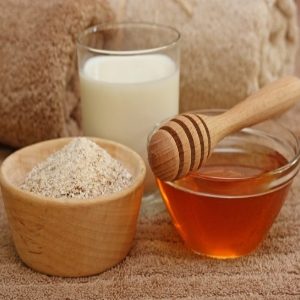
Exfoliation is a must for the skin. Dead skin needs to be removed as they make the face look dull. Make your own exfoliator by mixing oatmeal, honey, and milk. Apply it on the face and let it sit for 10 mins then start scrubbing the face gently with wet hands. Scrub slowly for 5 minutes and then wash it off with water.

4. TONER-

Toners make you feel refreshed instantly. Make a refreshing toner by simply mixing cucumber juice with rosewater. Store it in the refrigerator to give it a longer life. Though use it only for a week and then make a new one. Carry it with yourself when going out. Spray it on your face to give your face instant relaxation.

5. MOISTURISE –

This step is what many people avoid during summers. Change your moisturiser to an oil-free one. Moisturisers are required by the skin in every season. It becomes even more important to use a moisturiser after exfoliation to lock the nourishment back into the skin. Mix your night serum with your moisturiser and apply it to your face to give the skin all the goodness that it needs.

6. KEEP YOURSELF HYDRATED –

Drink as much water as you can. During summers this is certainly the most important thing. Drink a minimum of 8 glasses of water a day. And do not wait for your mouth to get dry. Try drinking refreshing juices like watermelon juice or lemon water.

RANDOM SKIN CARE TIPS-

1. Rub ice all over your face to instantly soothe your skin. But make sure you cover it with a muslin cloth, never apply ice directly to your skin.

2. Apply calamine lotion to soothe skin rashes.

3. If you are out of toner, simply apply cold rosewater on your face to calm and soothe the skin.

4. Avoid oily and fried food. Include lots of fruits and veggies in your diet.

Editor’s Note: These are such basic things Rashmi, but we always tend to take them for granted. Articles like these remind me to follow things sincerely. One thing I would like to add and which I also follow is carrying a thermal spring water and spritzing it time and again, be it Avene, Vichy, La Roche Posay,etc.

Image Source: 1,2,Getty

Do you follow all these summer skin care tips?
Step By Step Description of How to Do Hair Spa At Home

Step By Step Description of How to Do Hair Spa At Home

By Sanchita

The idea behind the hair spa is to rejuvenate and protect the hair. Yes, the good old warm oil massage and mild shampoo followed by conditioner is the regular or weekly routine carried on by us to protect and condition the hair. But, apart from that the hair needs specific care and rejuvenation by the process of hair spa. Now, hair spa is not necessarily done in parlors or hair care institutions and can be easily carried on at home with specific and easy available ingredients at your own volition. So you need not spend valuable money or time at the spa session every time. Let us see the step by step description of how to do hair spa at home.

1. Hair Oil

When you are going to devote yourself to the self-spa session, avoid using the readymade oils from the market which are nothing but merely mineral oils. So it will do no good to the hair. Use a concoction of hair oils like coconut oil, castor oil, almond oil and olive oil. The mixture should be 4parts coconut oil, 1 part castor oil, 2 parts almond oil and 3 parts olive oil. You can add other essential oils like argan, rose, ylang ylang or lavender as per your choice. Warm up the oil in a double boiler (no direct heat) and you can also add various herbs as well. For e.g. dried amla, methi seeds, neem leaves, hibiscus leaves paste, etc. can also be added in the warm oil which will further strengthen the hair. The hair oil is the vital step and best if it is done for.

2. Through massage

While the oil is the most important ingredient, the massage is the process which completes the procedure partly. Simply applying the oil won’t do so make sure you dedicate a good amount of time to massage the scalp well. Do not vigorously rub the scalp but merely run the fingers in a circular motion covering the whole area of the scalp. Massaging is essential as it improves blood circulation in your scalp area. You should massage your hair for 10 to 15 minutes. It helps relax the scalp and increase softness. It further aids in strengthening the roots of the hair and nourishes the hair-shafts, promoting new hair growth and strengthening current hair.

3. Warm Towel

If you have applied the oil a night before, then apply the warm towel in the morning and if you have applied the hair oil in the morning, do this at least an hour or two post oil massage. Dip a towel in warm water (just make sure not to burn the hand) and wrap it around the hair. In general, salons use a stream machine but the warm towel will surely do the trick. Warmth open up the pores on the scalp and thus it gets all the benefits of the oil. Also, it cleanses the scalp thoroughly, thereby promoting healthy hair growth.

4. Henna Mask

There are several hair masks available for hair and you can include the ingredients like ripe banana, eggs, curd, mayonnaise, etc. but I would suggest henna. Personally I have benefited a lot from the henna hair packs and it works like wonder. Henna is an age old method widely used in Ayurveda for treating hair and scalp problems. It is one of the best natural remedies for hair growth, helps to prevent dandruff and scalp itching. It acts as a good conditioner for your hair and helps to grow your hair. Mix the henna powder in the form of a paste with the help of curd or lemon and simply apply on the hair.

5. Shampoo

Once the hair mask is dried or after 40-50mins, wash off the mask with plain water. The rinsing will be easy as the hair as already well-nourished with oils. Next, move on to the main process of shampooing the hair. Try and use a SLS and PARABEN free shampoo which is mild and easy on the hair. Using a harsh chemically enriched shampoo means whatever effort you gave would go down the drain and the hair will be frizzy, rough and unmanageable. Shampoo will cleanses off every layer of dirt, grime, dandruff or any other residual substances on the hair, including the hair oil and hair pack. Although, the hair would retain the benefits for sure. One of the most important thing is that, rinsing off the shampoo is very important. A lot of people do apply it correctly and massage onto the scalp but forgets to rinse it out.

6. Conditioner

After the shampoo, apply the conditioner to the length of hair and keep it for around 2-3mins and no longer than that. Make sure the conditioner doesn’t slips onto the scalp and gets rinsed out properly after the shampoo.

7. Leave in Serum

This is the last step but I would call it optional. Since I have curly and dry hair, I always apply a leave in serum to make it manageable and frizz free but it is completely up to you. Also, I would not advise this step if you have thin and flat hair because it may weigh the hair down as the hair has already been conditioned since step 1.

These are the ways you can easily carry on the hair spa at home without shelling big bucks and also at our own convenience.

Editor’s Note: Absolutely loved this post Sanchita. This is the ideal procedure, wish I was not that lazy and time crunched :/ But even once a week or once in 2 weeks, following this routine would be amazing.

Image Sources: 1,2,3,4,5,6,7,8

Do you do hair spa at home?

DIY Homemade Hair Mask for Strengthening Hair

DIY Homemade Hair Mask for Strengthening Hair

By Nidhal

One can never run short of ways or ideas to pamper their crowning glory. There is a hairstyle or hair cut that you’d been thinking of getting at any point of time. There’d be those accessories that you’d be dying to experiment with. There would be hair products that you would have played with to give your tresses that bounce of life. But amidst all this, being Indians, we cannot never turn a blind eye to our Good Ol’ home remedies, can we?

So, why not treat our hair to the bountifulness of natural ingredients today and drool over them all over again? March straight to the pantry for there lies your paraphernalia for this DIY recipe.

INGREDIENTS NEEDED-

1. CURD- Enriched with the bountifulness of lactic acid, curd/yoghurt (called Dahi in Hindi) helps to eliminate dandruff, foul smell and dullness. It adds unprecedented gloss and softness that you just can’t get over.

2. TULSI POWDER- Being a plant that has been revered in Hinduism for centuries, Tulsi has benefits galore for your mane. It treats lice, dandruff, itchiness and scalp infections. Yes, your granny was right when she said that Tulsi is a miraculous plant. No questions asked anymore!

3. ALMOND OIL- Being a storehouse of Vitamin E, almond oil helps in locking moisture and adding that enviable sheen to your locks. Prefer organic/cold-pressed almond oil and not the ones that are laden with mineral oil. In my opinion, Almendrop 100% pure almond oil is a wise choice.

4. METHI/FENUGREEK POWDER- Now comes the wonder ingredient which cannot be done without. Methi helps to add shine in addition to imparting softness. It also accelerates the rate of growth of hair which spells cheer for those ladies waiting anxiously to flaunt long luscious locks. Opt for methi powder for grinding is a tad cumbersome and finely grinding takes patience (which sadly, today is a lost virtue).

PROCEDURE-

1. In a clean and dry bowl, add 5-6 tbsp of curd. This is the amount for shoulder length hair. Increase if you have longer hair.

2. Add 3 tbsp each of methi and tulsi powder.

3. Add half a tbsp. of almond oil

4. Mix well thoroughly to form a smooth and consistent paste.

5. Apply generously all over your scalp as well as length (of hair).

6. Wash off after 45 minutes with a mild herbal/organic shampoo. Condition if you feel the need to do so.

7. Repeat twice a week to expedite the results and acclimatise your scalp to these natural ingredients.

That is all for now, folks. Feel free to post your queries and results with me through the ‘comments section’ and try this DIY recipe to get locks which you cannot stop drooling over.

Pssst… It compels you to keep stroking your fingers down your mane intermittently!

Editor’s Note: This sounds really good Nidhal and methi and tulsi are very good for dandruff too. I am definitely trying this, have to get methi and tulsi powder now.

Have you tried this DIY before? If not, do so and let us know how you find it.

7 Denim Tricks You Cannot Afford to Miss!

7 Denim Tricks You Cannot Afford to Miss!

By Lovleen

Denims are a staple aspect of almost any wardrobe, and thus owing them is a no-brainer task. After all the versatility, comfort and vividity that they are able to deliver is phenomenal. But, wait aren’t you missing something? Well, though you have a huge collection of denim but are you happy with time? Does it make you a standout from the crowd? If not then this article is just for you. As here we will focus on some easy yet exclusive denim tricks and hacks that you help you reinvent the same old denim wardrobe the fashionable way. Because denim magic will never occur on its own, a little effort, innovative thought and creative tools can take your denim success a long way.

1. Start With Zipper Style

The usual denims that you wear can be taken as a layout which can be structured just the way you want with your creativity. This concept can be fruitfully used for transforming your denim into a zipper style denim. For this style all you need is a zipper, scissor and needles. First determine the area when you wish to place the zipper and then rip that area to create desired space for it. Consequently fix the zipper at the space and there you have it, a magnificent zipper style denim that speaks for itself.

Style Tip: Zippers can be fixed anywhere at the bottom of jeans, hips and thighs too, just let your creative mind do the job.

2. Denim and Shoes

Known to all Denims have remained to be a versatile asset in everyone’s wardrobe, so why restrict them with one type of shoes? Experiment with a plethora of shoes that you always wanted to wear, where women can have their sexy look with high heels, skinniest feel with boots, sporty touch with two roll flats and formal look with wedges, similarly men can make their move using the formal shoes, sporty running shoes, casual sneakers and many more,

Style Tip: Be careful with the colors that you pick and remember that the match up should always complement each other.

3. Lace It Up

This hack is just for the beauties out there, who can take their denim to a new dimension by lacing it up. Now, each one of us are a huge fan of laces then why not have them here too. Pick up the appropriate lace that you love, crop up your denim and stitch it up, it is as easy as it can get. But, the difference that it is going to create on the aesthetic appeal of the denim is something to watch out for. So, have you selected your perfect lace yet?

Style Tip: Lace is the key of this hack, go with black, cream, white or other self colors, avoid those that have amalgamation of various colors in one fabric.

4. Rip and Fill The Denim

Everyone is loves to have ripped denims, but now it's time to fill the ripped parts not with denim but a wide range of fabric. Fill this ripped areas with designs, patterns, fabrics or any other idea of your choice. If you do not have a ripped jeans then just take scissors to rip them off. Later, take the fabric that you want to attach with the denim and stitch it up.

Style Tip: Colors that you pick can be the reflection of your personality (black, blue, red) or the way you are (white, green, pink).

5. Sand and Stain Denim

Next style hack is an amazing one where you will have the ability to transform the aura of your denims. To do the stand and stain hack you are going to require a sand paper for sanding the denim, filer for scratching it and then a fabric marker for staining it. The stand and stain looks best near the hips and thigh region of jeans so it’s best to do them at its mid length. In this technique first you will have to sand the jeans with a sand paper for a while until the threads are visible and then scratch these threads with the help of a filer. Once the white inner threads of the sanded area are prominently visible then make sure of a fabric marker to stain these threads. Here, you can use any color depending upon what your styling preferences

Style Tip: Have the sand and stain area across different parts of the denim with variations in colors of the marker.

6. Crop the Denim

Bored with the same usual long pair of denim then why not crop them? Take the appropriate measurements, or the length until which you want to crop then and then go for it. During this process you can implement various designs through the art of cutting and stitching too. This means that by simply cropping an old denim you can bring it back to life but a new and refreshed look. Fashion experts believe that cropping a long denim is just like repairing it and bringing it to the gateway of unlimited fashion as its hard to go wrong with crop denims.

Style Tip: Pair crop denims with cool pair of shoes and tops to look your best and never forget those classy sunglasses.

7. Spray Vodka For Targeted Action on Stains

Presence of stains can hamper the aura of your denims, so it’s time to get rid of them with just a few sprays of vodka. Transfer the vodka into a spray bottle, and spray it on the stain for two-three times, allow it to dry and witness the stain disappear.

Style Tip: Regular care and maintenance is crucial for keeping your denim stylish and fashionable.

Editor’s Note: Absolutely love these hacks Lovleen. I would love to try the sanding, and also rip and fill.

Image Source: Google Images

Do you like these hacks? Have you tried them? I am definitely trying 1-2 😀

Home Remedies For Glowing Skin

HOME REMEDIES FOR GLOWING SKIN

By Rashmi

Hello peeps,

I am back with another DIY solution for your skin. Glowing skin is what everybody desires. People spend so much money by going to parlours. Though the effect of parlour treatment is almost immediate,is it long lasting? I don’t think so. I prefer using ingredients from the kitchen which are readily available.These are absolutely natural ingredients and are safe. And these things give a glow to your face like no other parlour treatment can give. And guess what? The results are permanent. When at first my mother asked me to use homemade face masks instead of going to the parlour i laughed at that but now after using all these homemade masks I am sure I am not going to the parlour for facials.

And I am sure these home remedies for glowing skin are going to work for you guys as well.

Happy reading ☺

1. Honey and lemon juice –

In a bowl take 2tbsp honey and mix in it 1tbsp lemon. Mix it well. Apply it on your face and leave it for 20 minutes.Wash it off with cold water. Lemon works as a natural bleach and honey gives instant radiance. One could also try applying just honey on the face. Honey and Lemon is perfect for removing your tan too.

2. Banana face mask-

In a bowl take half a banana(ripe),mix 1tbsp yogurt to it along with 1tbsp honey. Mix it well until the banana is mashed completely. You could add 2-3 drops of rosewater too. Now apply this face mask and leave it for 20-25 minutes before washing it off with water.Banana is best for getting glowing skin.

3. Tomato juice –

Simply mix tomato juice along with lemon and apply it on your face. Let it sit for 20minutes and then wash it off with plain water.Follow up with a good oil free moisturiser.

4. Olive oil or coconut oil-

People have this misconception that if they apply oil on their face, they will get pimples .This isn’t true. In fact either olive oil or coconut oil should be applied on the face for at least 10minutes before taking a shower. This is a really effective method to get that glow that you have always longed for.I follow this routine daily and this has worked effectively for me.

5. Potato and lemon juice-

Take the juice of half potato and mix in it about 1tbsp lemon juice. Apply this on your face daily for a week and you will be able to notice a beautiful glow on your face. Rub this mixture on your elbows too to get rid of dark elbows. This mix when used continuously for a week, will help get rid of all that stubborn tan.

6. Papaya face mask-

In a bowl take papaya and mash it well. Mix in it about 1tbsp honey, 1/2 tsp turmeric (you don’t want to be left with a yellow face instead of a glowing one) and 1tsp honey. Mix all the ingredients well and apply this on your face for 20 minutes and then wash it off. Apply rosewater on your face after that.

7. Milk and lemon-

Mix milk and lemon together. The milk should be unboiled. Apply this and you would get a radiant skin within a week. Milk helps to moisturise your skin and lemon helps in bleaching the skin naturally thus causing no side effect.

Additional tips-

1. For people with dry skin mix glycerine and rosewater and apply it on your face daily.

2. For people with oily skin mix gram flour(besan) with rosewater and apply daily. Alternatively fuller’s earth could also be used.

3. Apply aloe vera on your face daily .

4. Exfoliate your skin at least twice a week to get rid off the dead skin cells.

5. Always keep your skin hydrated and moisturised.

6. Always remove your makeup before going to sleep and apply your night cream.

7. Rub an ice cube on your face for an instant glow.

See more skincare tips/DIY HERE

Editor’s Note: These are easy and perfect everyday tips Rashmi. Glycerine and Rose water, I swear by. Even Fuller’s Earth, especially for summers.

Do you use these quick home remedies for that glowing skin? If not, do so now.

P.S: Images from Google.

How To Get Rid of Acne Naturally

How To Get Rid of Acne Naturally

By Rashmi

Hello girlies,

This is my first article in this space and i do hope that you all llike it . This being my first article I wanted to write about something that has troubled myself for years.Happy reading ☺

The most irritating thing about growing up is probably pimples.This had troubled me for years until i found a natural and permanent solution to cure it. Though natural remedies have a slower effect but they are permanent cures.I have been using these natural remedies for years and have a clear skin since then. So i thought of sharing these remedies with you all.

All you need to have is a bit of patience. I hope all these remedies works for you all as well. ☺

1. Fuller’s earth- In a bowl take about 4 tbsp of fuller’s earth. Mix 2tbsp of sandalwood powder and mix 1tbsp of turmeric powder into it. Add some rosewater and mix well. Apply this on the face and wash after half an hour. Continue using this face pack for 2 weeks to notice a difference.

2. Coriander leaves- Make a paste of coriander leaves and apply it on the effected area and leave it for 20-25minutes and then wash it off.Coriander leaves works effectively in curing acne.

3. Lemon- Mix lemon with honey and apply it on your face and leave it for half an hour and rinse off with cold water to get a clear skin.Lemon works great as a skin lightener too and is most effective in curing acne.

4. Garlic juice – Garlic juice is probably the most effective natural ingredient to cure acne, the only problem being that it stings really bad. Apply it for 15 mins and then rinse off with cold water and apply rosewater.

5. Black pepper – Mix crushed black pepper with rosewater. Apply on face and leave overnight. Wash it with lukewarm water in the morning.

6. Neem – Mix 2tbsp of neem powder, 1tbsp sandalwood powder and add a few drops of rosewater. Mix it well and apply it on your face. Let it dry and then wash it off.

7. Camphor – Camphor is known to cure acne.It reduces redness and itching. Mix 1–2 cubes of camphor (depending upon the size) and rose water and spray it on your face.This works as a great toner. This is the elixir for people with oily skin. Spray it on your face daily to get rid of acne.

Editor’s Note: I absolutely loved the tips Rashmi, never tried black pepper and camphor. Will surely give them a try

Have you tried these tips? What do you do to keep acne at bay?

P.S: Images from Google

DIY – Makeup Setting Spray

DIY – Makeup Setting Spray

By Sanchita

Makeup setting spray plays a very important role in the application and setting of base. In fact, this is the reason the makeup looks so flawless and does not budge for a long time even during scorching heat. You have often seen the matte or dewy look on various celebrities and how impeccable it looks! It also helps in removing the cakey or any patchy look in case you applied the powder or foundation in excess. Sadly, not many Indian brands manufacture makeup setting sprays and therefore the other brands are quite expensive. One day, I was having a casual chat regarding makeup setting with my friend who is a makeup artist and she told me how she sets the makeup on her clients. She uses a concoction liquid of certain ingredients which are readily available in the market and I was so determined to make it. In fact, you can also make two different setting spray – one for dewy and the other for matte. So, scroll down to see how to make your own makeup setting spray.

INGREDIENTS

  • Rose water – act as a toner, moisturizer and skin enhancer.
  • Aloe Vera Gel – helps in setting the look without getting patchy or cakey.
  • Glycerin – moisturizes the skin and evens out the makeup. Acts as a sticky base to keep the makeup adhered to
  • Distilled Water
  • Empty Spray Bottle

PROCEDURE

  • Take an empty spray bottle and make sure it is completely cleansed, sterilized and dried. Fill 1/3rd of the bottle with distilled water.

  • Add 2/3rd rose water to the bottle.

  • Add 1 tbsp. of Aloe Vera Gel.

  • Now, add 1/2 tbsp. of glycerin or any other essential oil of your choice.

  • Shake the bottle very well so that the ingredients are thoroughly mixed.

  • Voila! Your makeup setting spray is ready!

Note: If you want to make the spray for matte finish, use the distilled water and rose water in a 50:50 ratio and add only little bit of glycerin. However, if you want to make the spray for dewy finish, use the distilled water and rose water in a 20:80 ratio and add 1tbsp. of glycerin. Also, you can add Jojoba Oil or any other essential oil to increase the hydration factor during winter.

Caution: If you’re allergic to any of the above mentioned ingredients, please do not incorporate them in the concoction.

This can also be used a toner and refresher in this scorching heat. Simply spray the liquid from a slight distance, closing the eyes and let is dry on its own. Also, do not spray too much as it will take a long time to dry up. It is free from chemicals and preservatives and hence it is best to use it up within 1-2 months of making.

Editor’s Note: This sounds amazing Sanchita, definitely worth trying. I am surely going to.

Will you try this DIY Makeup Setting Spray?

Top 5 Natural DIY Hair Conditioning Treatments

Top 5 Natural DIY Hair Conditioning Treatments

By Somreeta

The dry and cold weather during the winter months tend to strip your hair of moisture. As a result, your tresses look dull, frizzy, and lifeless. Dry hair is more prone to breakage and develops split ends. Hence, it is important to nourish and condition your hair. The right kind of conditioning treatments during the winters would help to lock in moisture content in the hair shafts, thereby making your hair soft and manageable. Check out the top 5 natural hair conditioning treatments that are not only simple but also effective.

1. BANANA NOURISHING HAIR TREATMENT: Put a ripe banana, 3 tablespoons of olive oil and 3 tablespoons of honey in a blender. Blend well and apply this rich concoction on your hair shafts. Olive oil is one of the best known natural moisturizers while honey is a natural humectant. Banana helps minimize contraction while nourishing your hair thoroughly. After 30 minutes, wash it off. Be patient while washing, as banana tends to stick to your hair. Do it once a week for best results.

2. WHOLESOME EGG TREATMENT: Whisk an egg, 4 tablespoons of mayonnaise and a cup of plain yogurt in a bowl and apply the mixture liberally on your hair strands. The natural proteins and vitamins present in egg works wonders in strengthening the hair follicles and bringing about significant reduction in dryness. Yogurt makes hair soft while mayonnaise moisturises your hair. Wait for 45 minutes post application and rinse thoroughly with trepid water and shampoo. This homemade hair treatment can be done twice every week.

3. AVOCADO PROTEIN HAIR TREATMENT: Avocado is a rich storehouse of natural proteins and oils. Mash an avocado and add 5 to 6 drops of peppermint oil. Shampoo your hair, squeeze the water out and apply this mask. Wait for about 20 minutes and rinse well. Hair feels soft, smooth and hydrated.

4. CLASSIC MILK AND HONEY TREATMENT: It is pretty easy to prepare this classic hair mask. Mix two tablespoons of honey to a cup of whole milk and apply this natural hair potion along the length of your hair. Leave it on for about 15 minutes and rinse well. This mask strengthens your hair, moisturises it and rejuvenates dry hair. Do this treatment twice every week to see amazing results.

5. HOT OIL TREATMENT: The homemade hot oil treatment has stood the test of time. Warm up any natural oil of your choice and massage your hair and scalp well. You could use olive oil, almond oil, coconut oil or jojoba oil. You may even love to blend two oils in equal amounts and then, add a few drops of your favourite essential oil for extra benefits. Follow up with turban therapy and then shampoo. Hair feels soft, moisturized and well-nourished.

Isn’t t easy to attain gorgeous locks just by following a few homemade hair care treatments? Opt for these DIY conditioners and get beautiful and nourished hair, naturally!

Editor’s Note: I so agree with Hot Oil one. I am going to try a few of these for sure, especially milk and honey 🙂 Nice post Somreeta

P.S: Images from Google

Do you follow these at home DIY’s for Deep Conditioning your hair?

DIY Anti-Tan Face Pack For Oily Skin

DIY Anti-Tan Face Pack For Oily Skin

By Sanchita

Hello everyone. I am back with a DIY this time which, I am sure, would be very useful to all the oily skin types in the upcoming scorch summer. The thing is, when we go out in the sun, our skin produces extra melanin to protect the internal layers of the skin and thus we end up with deeper complexions i.e. tan. The tan is unescapable and no matter what product we apply or the protection we take – we always end up with a discolored complexion after a day’s turmoil. With sun tan comes the pigmentation and early signs of ageing like fine lines and wrinkles that contributes to the dullness of our whole outlook. Due to my acne prone oily skin, I always stay away from chemical laden face pack and instead make my own with the help of certain ingredients easily available anywhere. This face pack has helped to restore my skin’s complexion and texture for all these years and I cannot simply live without it. So, here’s the ingredients and steps listed below to make the Anti-Tan face pack for oily skin.

INGREDIENTS

Besan (Bengal Gram)
Fuller’s Earth (Multani Mitti) (BUY HERE)
Sandalwood Powder (even sandalwood paste would work) (BUY HERE)
Rose Water
Clean bowl and spoon.

STEPS

1. In a clean bowl, add 1tbsp. of Besan.

2. Add, 1tbsp. of Multani Mitti to the mixture.

3. Next, add ½ tbsp. of sandalwood powder (or 1tbsp. of sandalwood paste).

4. With the help of a spoon, add all these dry ingredients thoroughly.

5. Pour the rose water, 1tbsp. at a time to get the medium consistency of a face pack.

6. Leave the face pack for about 30-40mins and rinse with cold water. Pat the skin dry.

BENEFITS

Besan (Bengal Gram) – A common household ingredient that contributes to the healthy texture of the skin. It has the ability to naturally cleanse the skin and remove every layer of impurities from the pores and also tightening them to a large extent. It is also a very gentle exfoliator for oily skin which can’t resist harsh scrubs. Most importantly, it helps is removing the tan, brightening the skin and also helps in eliminating acne and sudden breakouts.

Fuller’s Earth (Multani Mitti) – This is the Holy Grail for every girl with oily skin. Apply any face pack with multani mitti will not only make your skin oil free but also prevents the acne as well. It diminishes every layer of discolorations, pigmentation, scars and blemishes on the face with regular usage. It is further known to improve the elasticity of the skin, thereby reducing the signs like fine lines, wrinkles, etc.

Sandalwood Powder – This is one gorgeous ingredient that contributes to skin lightening by removing every ounce of impurities from the skin. I am not saying it will make you ‘fairer’ (because that never happens) but it will make you fall in love with your complexion. It enhances the skin’s texture to a large extent. The ant-tan properties soothes sun burns and removes it and also the antibacterial properties works on acne prone skin like a miracle. It tightens the drooping skin tissues with the intention of providing a youthful appearance to the skin.

Rose Water – when nothing works on your skin, rose water is the best astringent to go for. The product revitalizes aging skin and keeps fine lines and wrinkles at bay. Maintaining the skin’s pH balance, it hydrates, refreshes and moisturizes the skin, thereby making it smooth. The antioxidant properties of rose water help to strengthen skin cells and restore skin tissues.
So, definitely try this out and let me know how this worked for your stubborn acne prone oily skin.

Editor’s Note: I absolutely swear by multani mitti and sandalwood powder, loved this DIY Sanchita.

Have you tried this at home DIY to remove your tan yet?

How To Unclog Facial Pores Naturally

How To Unclog Facial Pores Naturally

By Somreeta

If you wish to keep pimples, blackheads and acne at bay, it is important for you to clear the clogged pores in your skin. Deep cleansing and exfoliation at regular intervals help in doing away with the dead skin cells, oil, dirt and impurities that clog the pores. Keep reading for the best tips and tricks to unclog facial skin pores naturally.

How To Unclog Facial Pores Naturally: Top 3 Tips

1. STEAMING: Steaming is one of the cheapest yet most effective natural treatments that help remove the dirt and grease that have accumulated in the pores of the skin. Heat water in a pot and cover it with a lid. As soon as the water starts producing steam, remove it from the source of heat and lean over the pot of steaming water, while covering your head with a towel. Make sure that the steam touches your face. For added benefits, add a few drops of tea tree essential oil to the water. Steam your face for about 5 to 7 minutes. Whenever you feel that the steam is too hot for you to put up with, take a short break. After you are done with steaming your face, pat your skin dry and follow up with a toner and a mild non-comedogenic moisturizer. Steaming your face once a week is indeed a great practice.

2. EXFOLIATION: Exfoliate your skin to chuck out the impurities off the pores of your facial skin. Mix baking soda (2 tablespoons) with cinnamon powder (1 tablespoon) and honey (4 tablespoons). Add the juice of half-a-lemon to the mixture and apply the concoction on your face. Rinse with water after 5 minutes. Baking soda is an excellent exfoliating agent that is gentle on the skin and helps unplug clogged pores. If you are not comfortable using baking soda and lemon juice on skin, you can try out the honey-sugar scrub recipe. Mix 4 tablespoons of green tea with honey and sugar, a tablespoon each. Scrub your face with this homemade scrub and wash off with water. Follow up with a mild moisturizer.

3. APPLICATION OF CLAY MASKS: Clay masks are known to draw out the oil and grease from the skin pores efficiently. Mix bentonite clay, oatmeal powder and water, one tablespoon each. Apply this clay mask on your face. Once it dries up, rinse thoroughly with water. Follow up with a good quality moisturizer to prevent dryness.

A weekly skincare regimen, consisting of steaming, cleansing, scrubbing, toning and moisturizing could go a long way in preventing clogged pores. Unclog your facial pores naturally and keep your skin smooth and glowing, always!

Editor’s Note: Totally believe in all three, while steaming doesn’t happen always. Even a warm muslin cloth works at times. And clay masks are so amazing to pull out the dirt and perfect for oily skin to keep oil at bay.

Do you follow these tips regularly?

Image Source: 1,2,3