Category Archives: Tips

Best Saffron DIY Face Packs to Get Fair & Glowing Skin, Indian Skincare Blog, Beauty Blog

Best Saffron DIY Face Packs to Get Fair & Glowing Skin

Best Saffron DIY Face Packs to Get Fair & Glowing Skin

By Nidhal

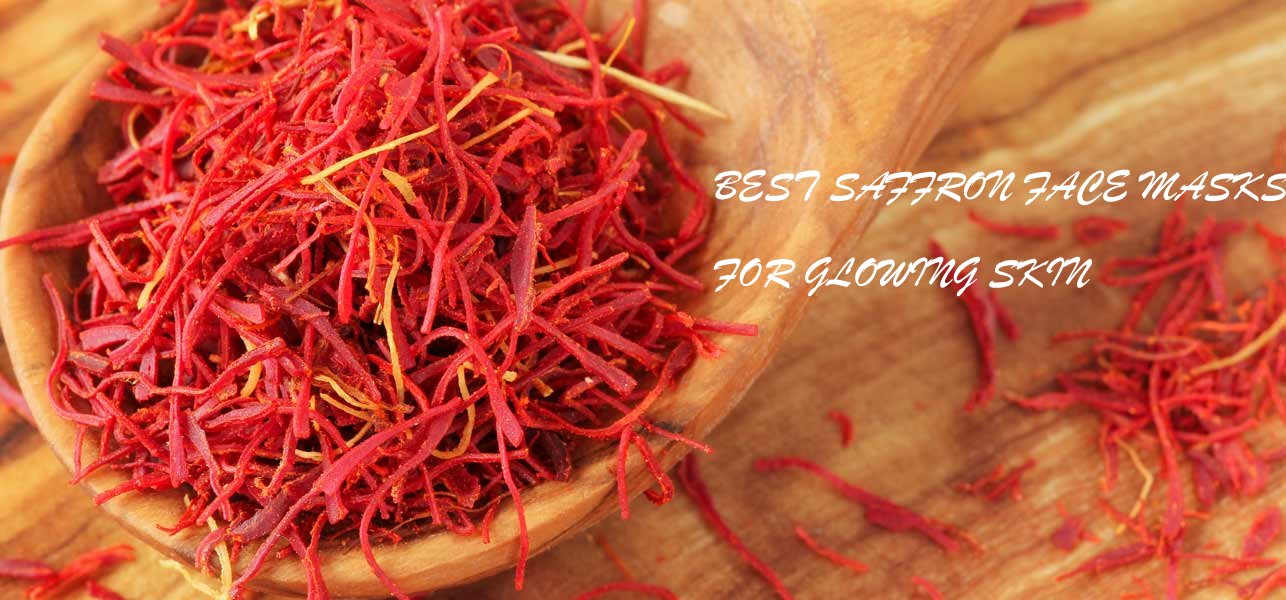
The bright red-coloured, minuscule strands of saffron (called Kesar in Hindi) are exactly what you need to incorporate in your skin care regimen. Saffron is one spice that is capable of burning a hole in your pocket. It is used for adding flavour to dishes. It is a rich source of health benefit nutrients like vitamins A, B, C, foliate and minerals like zinc, potassium and sodium that rejuvenate skin cells and promote the regeneration of new cells. It helps in the removal dark spots and blemishes.

So, let us concoct some skin treats from the comforts of your kitchen using saffron (kesar).

1. SAFFRON, RAW MILK & BESAN MASK

Saffron is an excellent skin toning agent. It helps in eliminating blackheads and unclogs clogged skin pores. Saffron also scavenges free radicals and promotes better circulation of blood, thereby ensuring that skin looks toned and firm.

Raw milk, rich in B-vitamins, alpha hydroxy acids, calcium and other potent antioxidants, has innumerable skin benefits! It works to nourish skin cells from deep within and keep skin moisturized for long. Besan is used to cleanse and exfoliate skin.

PROCEDURE- Soak 3-4 saffron strands in raw milk for two hours. After that, the colour of the concoction will turn yellow wholly provided the saffron you have used is authentic. Add a tbsp. or two of besan flour and mix well. Apply on your face as well as neck. Let it dry for around 30 minutes and then, wash off. Feel rejuvenated, don’t you?

2. SAFFRON & CURD MASK

Packed with various vitamins such as A, C, and the B vitamins, saffron-the wonder ingredient is known to possess skin brightening properties. Acne and pimples can leave behind scars that take a long time to fade. Using curd and teaming it up with saffron will speed up the process of healing. Sounds exciting?

PROCEDURE- It is as simple as it gets. Just soak 3-4 strands of saffron in a heaped tbsp. of curd/yoghurt for two hours. Post two hours, the concoction will turn yellow completely given that the saffron you have purchased is authentic. Smear it generously on your face as well as neck. Let it dry. It will take around half an hour to dry. After this, wash off your face with adequate cold water.

3. SAFFRON, MILK & SANDALWOOD POWDER MASK

The inherent anti-inflammatory nature of saffron arising from the high presence of antioxidants enables saffron to be used as a potent tool against various skin conditions such as pimples, acne, and Rosacea. To top it all, if we have milk (raw one please) which boosts collagen production, slows down fine lines and wrinkles, protects skin from free radicals that cause premature aging, helps fade dark spots and marks, reduces acne and promotes skin elasticity, you know it’s going to be “Good times” for your largest organ aka your skin. Finally, sandalwood powder owing to its fragrant and soothing aroma will act as the binding agent in this recipe. It also absorbs excess oil off one’s face and neck. Time to cheer oil-skinned ladies, isn’t it?

PROCEDURE-Soak 3-4 saffron strands in raw milk for about two hours. Add a heaped tbsp. of pure sandalwood powder (known as Chandan powder in Hindi) and mix well. Once a smooth and consistent paste id formed, generously daub a fine layer of it on your skin. It will take around 30 minutes to dry solely. Wash off with cold water and admire the newfound glow.

4. SAFFRON, ROSE WATER & COCONUT MILK MASK

The moisture absorbing and enhancing nature of saffron makes it an ideal home remedy for dry, chapped and rough skin. On the other hand, we have rose water (known as Gulab Jal in Hindi) which helps to maintain skin’s pH balance, fight acne, dermatitis and eczema.

Rose water also hydrates, revitalizes and moisturizes skin. It helps to tone one’s skin. It also helps to revitalize aging skin and keeps fine lines at bay. So many virtues rolled into one! Didn’t that get you ecstatic? Add to this, coconut milk needs no elaboration when it comes to moisturisation.

PROCEDURE- In a tbsp. of pure rose water, add 3-4 saffron strands. Let them soak into it for 2 hours. Finally, add a tbsp. of coconut milk. The final/resulting concoction will be predominantly liquid. That goes without saying that application would be messy but do not fret. You’ll be blown away by the results if not immediately then, definitely over a couple of uses periodically.
Kurtis for Different Occasions & How to Pair Them

Kurtis for Different Occasions & How to Pair Them

Hi guys,

Today I am talking about kurtis, how versatile kurtis are and there is one kurti for every occasion.

When it comes to the well-defined ‘Indian wear’, the first thing that comes to our mind while walking towards the closet is Kurti. This fashion trend never goes off and one of the best smart casual wear. In fact, Kurtis are so versatile that you can wear them for college, office, family events, day-out, party wear and literally every way you prefer.

Kurtis can be made adaptable with various styles like short or medium length, from various materials of cloth and the embroidery as well. thus, the exclusive designs, elaborate patterns, various hues and appealing shades blended with western as well as Indian styles has made Kurti so popular as a fashion trend. There are various reason to love them, different ways to pair them up.

I came across this site ‘Rangriti’ and they have such gorgeous kurtis. There is one for each occasion from work to more casual wear to more dressy ethnic. I have picked a few here and highlighted which can be worn for what occasion.

1. Yellow Short Kurti

Now this one is so colorful! I love the yellow and pink combination and the pom pom bead tie-ups. This is more of a casual wear. You can team it with denims or a nice, long, flared skirt. If going for a casual brunch, then with denims and if for some wedding related function like a mehendi, this would look perfect with a flared skirt in pink.

2. Indigo Blue mid length kurti

This will work with a white churidar for work and even a white skirt/palazzos for a more boho look. Team it with feather/beads/colorful accessories for a casual boho chic look.

3. Mustard yellow long kurti

Now this one can be a little dressy. Team it with a black churidar and maybe even a heavy dull gold work dupatta and you can wear it for a wedding.

There are so many ways to wear a kurti and one can dress it up or dress it down on teaming with correct bottoms and accessories. I love kurtis and have so many different styles of them in my wardrobe.

I love online shopping and the variety of kurtis available online these days is amazing. Also at very affordable prices. I would highly recommend to buy kurtis online.

What is your favourite way to wear a kurti? Do you go boho chic with kurtis? Let me know some of your ideas in the comments below.

Top 10 Marilyn Monroe Beauty Secrets

Top 10 Marilyn Monroe Beauty Secrets

By Ria

Hiii Beauties,

Marilyn Monroe is not only a celebrity in Hollywood but the most talked about and worshiped diva in the beauty circles too. Right from her seven inch dress, pouty lips, gorgeous eye lashes and sexy legs everything was talk of the town. She is known to be one of the most beautiful women of her time and till date. She is truly a legend in the glamour world.

But in spite of all her controversies, she is known to be the mother of beauty and makeup tips. So, here we are listing down some of the eternal and ever glowing beauty and makeup secrets of the diva herself –

1. Use Vaseline as a Highlighter – Yes, Vaseline the regular petroleum jelly which all of us have in our house. We use only on lips that too in bed time. But the light sheen which Vaseline gives has always been used by Marilyn as her highlighter. The light healthy glow will give you just the finish of a radiant skin and nothing else.

2. Use Five Different Shades for Her Pouty Lips – She used to begin by applying a nude shade just to prep her lips. Then she used to apply a regular matte lipstick and top it with a darker shade. The darkest shade was applied on the outer corners and then the cupid bow was highlighted.

3. Use Oils for Shiny Eyelids – Marilyn was a firm believer of shiny eye lids. So, she always used to finish her look by applying a face oil or Vaseline to get her shiny eyelids.

4. Use White Eye Shadow as a Base – The white eye shadows trend was started by Marilyn Monroe herself. Her makeup artists used to apply white eye shadow all over her eye brow area and even in the inner corners of her eyes. This provided much more depth and colour to her eye area.

5. Mixed Eyeliner – We all used to apply either black or brown eyeliners. Even if we apply any coloured eyeliners, we tend to go with a single colour only. But Marilyn used to apply a combination of white, brown, black and blue eyeliners to get that super dramatic look.

6. Blush for Contouring – Yes, you heard it right. We all use blush to highlight but the talented makeup artists of marlin Monroe used to apply blush on her nose for contouring. They used to apply a bit of blush in the area where nose ends to give it a shorter nose look.

7. Half Falsie Eyelashes – Marilyn Monroe used to love her eyelashes. She loved the long dramatic falsies too. But no doubt they looked over dramatic. So, she used to cut her falsies in half and then apply them on her eyes. They used to give a dramatic but still natural look.

8. Arching Eyebrows – Well, arched eyebrows are a trend now even. But what Monroe used to do at that time was that she used to use a white eyeliner to drag it up. But not make the end too pointed else it looked fake.

9. Beauty Sleep – She had a secret recipe of her beauty sleep. She used to steam her face every night before sleeping. And used to sleep naked in a big bed with completely dark room. She used to have at least 10 hours of sleep every day.

10. Moisturisation is the Key – She used to love her moisturisers and always carried one in her bag. She used to have different moisturisers for different parts of the day and even for different body parts.

So, these were some of the top beauty and makeup secrets by Marilyn Monroe. Let me know your thoughts in the comments down below.

10 Ways To Get Soft, Pink Lips Naturally | Lighten Dark Lips

10 Ways To Get Soft, Pink Lips Naturally | Lighten Dark Lips

Guest Post by Disha

Who doesn’t want soft, supple, pink lips? We all do! But instead most of us have to suffer with their dryness and pigmentation. This happens because we fail to take care of them. When your lips are dark and dry, they get itchy and you cannot even apply lipstick properly! No one is a fan of that I am sure. To get naturally pink lips one needs to take care of their lips and there are a lot of ways to that. And believe me they are all very easy and can blend into your skin care regime effortlessly. Apart from being doable they are so effective that you wouldn’t even need to use your MAC lipstick in the shade Please Me to give you the appearance of naturally soft and pink lips. So, here are 10 ways in which you can do so.

1. Exfoliate

Exfoliation is the key ladies! It helps get rid of dead skin and dirt. All you need is a toothbrush. Yes a toothbrush has more uses than just brushing your teeth. Just be careful that the one you choose has soft brittles so that it doesn’t hurt your lips. So wet your toothbrush a little and then gently rub it on your lips in circular motions.

2. Choose Lip Balm With SPF

As we all know the UV rays from the sun do harm our skin and for that we apply a sunscreen lotion but do we do something for our lips? No we don’t. Hence, always choose a lip balm that has a decent amount of SPF in it. This way your lips will be hydrated and at the same time protected.

3. Drink Water

I feel drinking water can solve most of your health problems. You need to keep your body hydrated. So drinking 6-8 glasses of water everyday is beneficial for your whole body. But when it comes to your lips, keeping yourself hydrated will moisturize them and make them supple.

4. Milk and Pomegranate

You know how pomegranates have a lot of pigment in them. So why not use them for your lips? This following method with lighten dark lips and give them a natural pink tone. Crush pomegranate seeds and add some cold milk in such a way that when mixed together, a paste like consistency is achieved. Then apply it to your lips. Let it stay and after around 10-15 minutes wash it off.

5. Removing Makeup

Yes we have all heard that never sleep with makeup on but how many of us really follow it? Before going to bed make sure that you have completely taken off the lip liner and lipstick and applied a lip balm. This will hydrate your lips throughout the night. Whereas keeping on lipstick all night long can darken your lips.

6. Lemon and Sugar

This one acts as a scrub as well lip-lightening agent. Take a lemon slice and put sugar on it. Then gently rub this on your lips. Lemon is a good bleaching agent hence it will lighten your lips whereas sugar will exfoliate it. So this combination is enough to make your lips pink.

7. Cucumber Slice

We all know cucumber is very cooling and has a soothing effect. So rub a cucumber slice on your lips which will instantly refresh them and make them pink on doing this frequently.

8. Aloe Vera Gel

This can act as a great lip balm. Take some aloe vera gel and store it in the refrigerator. It helps in soothing your lips, generating new cells and protects from harmful rays of the sun. You can just directly use it as a lip balm everyday.

9. Glycerin and Lemon Juice

Take 2-3 drops of lemon juice and glycerin and mix them together. Use this mixture as an overnight lip mask. While glycerin will hydrate your lips, lemon will lighten it.

10. Coriander Leaves

Take a few coriander leaves and crush them. You can also put in little water/milk if you like. Then apply it on your lips and let it stay for a while. After about 20-30 minutes, wash it off. Coriander leaves help in lightening your lips.

I told you all of them were easy ways! Weren’t they? They are very doable. Choose any method or methods and stick to them. Make sure whichever ones you choose, you follow them regularly for best results. Voila! You got yourself soft and pink lips.

Author Bio: Disha is a passionate health, fashion & beauty enthusiast. She is the founder and editor- in-chief of DivasWorld. Her blog, DivasWorld covers beauty, makeup, fashion and lots more!

Onion Juice For Hair – 5 Benefits & Ways to Use

Onion Juice For Hair – 5 Benefits & Ways to Use

By Nidhal

The list of hair woes is endless. However, there is one wonder ingredient in your pantry that can rescue your mane from all the trouble. It’s none other than the good Ol’ onion. Don’t believe? Have a look at its benefits for your mane. Jot down these benefits of onion for hair so that the next time you suffer from any hair woe that can be combated by use of onion juice, you have something to refer to which will bring you back to me, hopefully thanking me.

1. ARRESTS HAIR FALL- Tried every possible product and home remedy to somehow arrest your crowning glory’s strands fall like wilted leaves off your head? Dissatisfied still? Give a shot to onion juice. Onion is a rich source of sulphur, which is extremely beneficial for healthy hair growth. It prevents hair breakage and accelerates regrowth of hair.

PROCEDURE- Gently massaging the fresh juice of an onion or two onto the scalp helps increase blood circulation, thereby strengthening the hair follicles. Be patient and persistent as I always say. I understand that saying this is a cakewalk and being in the shoes of the person suffering is a Herculean task but stressing will aggravate the situation all the more. Follow the regimen for at least two months twitch a week.

2. BID ADIEU TO PREMATURE GREYING OF HAIR- Does your face pucker on seeing those hideous white strands making a peak-a- boo out of nowhere from your scalp as you stroke your mane with your fingers or spruce it up? Head to the pantry and raid it for an onion. Premature greying of hair is caused as a natural antioxidant- catalase reduces. Onion helps control this problem by increasing catalase. Simply chop an onion (Devdas alert!)

PROCEDURE- Strain it well to remove all the chunks and using a cotton ball dipped wholly into the juice of the onion, slather it generously all over your scalp focussing a little more on the area where you have white hair strands. Wash off your hair after half an hour and shampoo as usual. Since onion juice is entirely liquid, it will be a messy affair. Repeat twice a week for two months and anticipate positive results with bated breath.

3. BID FAREWELL TO SCALP INFECTIONS AND PARASITES- Remember class 8 th science which introduced you to the world of parasites and hosts? Let me save you the hassle of recalling it. Parasites are creatures that ‘live off’ hosts. They derive everything from shelter to nutrition from the host without giving anything positive in return. In other words, the parasite gets to be a free-loader! And we do not entertain such creatures especially if they are on our scalp. To do away with such parasites inhabiting our scalp, this time we will rely upon ‘onions’.

PROCEDURE- Simply grind and sieve them to extract their juice. Mix it with amla powder (which has a rich content of Vitamin C). Apply using a cotton swab and then, wash your hair with plenty water. Onions have anti-bacterial properties which is useful in getting rid of scalp infections and parasites while amla will strengthen the locks.

4. IMPARTS SHINE TO YOUR TRESSES- I tried it once and was thrilled to see how lustrous my locks looked after washing off the juice. The first use itself threw results, however, this point is subjective but there is no denying that onion juice imparts a winsome glow to your mane. Onion belongs to the Allium family and is enriched with sulphur-containing compounds that are responsible for its pungent taste and odour.

PROCEDURE- Simply mix adequate onion juice with reetha powder and curd. Keep it on your hair for about half an hour and then wash off using a mild shampoo and conditioner. Repeat twice a week to acclimatize your hair and scalp to these ingredients. If you wish to add/subtract any ingredient that you think suits your hair, you are welcome to do so.

5. STRENGTHENS YOU MANE- Onion juice is very rich in Sulphur content. Application of the juice to the scalp stimulates and improves blood circulation. Hair grows from the follicles in the scalp. The next time you feel your hair is losing its strength, head no further than your very own pantry.

PROCEDURE- To use, simply chop and strain the juice of an onion. Mix with shikakai powder. Apply on your scalp and rinse thoroughly after half an hour. Shampoo and condition as usual. Repeat twice a week for at least two months.

Editor’s Note: These are some interesting DIY’s Nidhal, I will surely try

Have you tried using onion juice for your hair?

DIY: Get Instant Soft & Glowing Skin for Weddings/Parties, etc | Remove Sun Tan

DIY: Get Instant Soft & Glowing Skin for Weddings/Parties, etc | Remove Sun Tan

Hi guys,

Today I am sharing this quick DIY that I often do before special occasions for that soft and glowing skin!

All you need is a ripe banana, lemon juice and honey.

Take half a ripe banana and mash it really well with a fork, add 1 tsp. honey and 1 tsp. lemon juice and mix it really well.

Apply a thick layer of it all over your face and keep it on for 10 minutes. Wash off with normal water and pat dry.

You will see instant glowing skin!

Let me tell how and why it works..

Bananas are high in vitamin A, B, E and are a good source of potassium, zinc, iron and manganese. They are good for dry and oily skin alike. They are ultra moistuzing and instantly soften the most dehydrated skin. They are also rich in B vitamins and zinc which help to fight free radicals and improve the appearance of fine lines and wrinkles. Vitamin C in bananas may also help improve the appearance of dark spots and acne.

Lemon is rich in Vitamin C and citric acid and is full of antioxidants. It helps fade acne scars & blemishes and gives an even skin tone and brighter looking skin. It controls oil and shine to an extent and being anti bacterial also works on acne and blackheads. It also acts as a gentle exfoliator on dead skin cells.

Honey is a natural humectant, meaning it draws moisture from the air into the skin and ensures it’s retained it in the layers for penetrating, long-lasting hydration. It is anti-inflammatory and antibacterial, hence helos in calming redness and acne, and also helps to decrease the appearances of scars and increase healing and tissue regeneration

That’s it! Super quick and easy. I hope you like this DIY and try it. Do let me know how it works in the comments below 🙂

Benefits of Shaving & How to Shave

Benefits of Shaving & How to Shave

Hi guys,

If you remember some time back I did a post on shaving myths, see HERE. So today I thought of sharing the benefits of shaving and the correct method of shaving.

Let’s begin with the benefits of shaving:

  • Economical : It has to be the most economical method of hair removal. While waxing requires help usually and the charges range from Rs. 500-1000 for hands/legs etc., depending on the body parts and type of wax and from where/whom you get it done, shaving can be done at the comfort of your home yourself and one gift pack worth Rs.550/- will last you ages as it comes with changeable cartridges
  • Time saving : You need not visit a salon or need any appointments for shaving. You can do it anytime, anywhere. All you will need is your razor and shaving gel.
  • Easy and quick : It’s also the quickest method of hair removal. This is the biggest benefit in my opinion 😀 I am always running late and I am most of the times in knee length dresses/midi skirts, I bless my Gillette Venus during that time :p It’s like a savior, I finish shaving in 5 minutes literally.
  • Painless : Well yes ladies, it is completely painless! While waxing and epilation give me huge red bumps which take 2-3 days to subside, shaving seems like a blessing in comparision.
  • Travel friendly : I always carry my razor when I am going on a 9-10 days holiday/vacation. With my razor with me, I can wear whatever I want to! Yes, you can carry an epilator too, but a razor is much smaller and lighter in comparision. And as explained above, easy, quick and painless coz you got no time on a vacation to sit and epilate! Always prefer a razor over an epilator

While there are number of benefits of shaving, the only con would be that you have to shave once in 5-7 days depending on your hair growth. But I think that is totally doable considering the benefits and how quick it is.

Now, let’s come to the correct method of shaving. I know a lot of girls have dryness, itchiness, ingrown hair, etc. after shaving, if you follow this method step by step, I assure you that there will be no such problems.

1. Exfoliate your body/parts where you want to shave a day prior using a body scrub/loofah/bath gloves.

2. Moisturize your skin beforehand. Never start shaving on dry skin

3. Soak the skin for 1-2 minutes in the shower before starting to shave. But do not let the skin soak in the bath for too long as the water will plump up the skin and that may affect the smoothness of shave.

4. Always use a shaving gel. The Satin Care shave gel is meant for sensitive skin and has aloe vera. It not only keeps the skin moisturized and give a super smooth shave, it also soothes the skin coz of the aloe.

5. Clean the razor well, in between each part.

6. Wash off, pat dry and use a rich, moisturizing body butter/body lotion. If it has Retinol, that would be even better!

7. Keep moisturizing for 2-3 days

That’s it. If you follow this exact method, there will never be any dryness or itchiness.

You can buy the Gillette Venus All in One Pack HERE

How do you shave? Do you follow this method?

How to Fight Under-Eye Discoloration Naturally?

How to Fight Under-Eye Discoloration Naturally?

By Nidhal

Eyes are the windows to one’s heart. So true! But they are a lot more than that. They are also indicators of your health. Given the kind of lifestyles we all are living, we frequently tend to cross paths with dark circles, patchiness, discoloration, puffy eyes and what not. The first stage is of denial when we see signs of these pesky woes. Conveniently and more aptly sceptically we wring up our hands in disbelief brushing aside those signs.

A few more days roll by and then those signs begin drawing unwanted attention for people point it out. That sends the ‘Oh-No- Something’s-Wrong’ flag soaring high. Petrified, we wade across over-the-counter measures and what not to allay them but more often than not, such products do not throw positive results. Disappointed, we fall into a whirlpool of pessimism. But hey, worry not. We have a treasure trove of pocket-friendly recipes-none invasive, painful or costing you an arm and a leg at your disposal that’ll leave you heaving a sigh of respite.

1. MALAI/MILK CREAM- Milk has great lightening abilities for the skin and can be a very affordable option for dealing with dark circles under the eyes, which can have great results. Milk cream is a derivative of milk. Being a powerhouse of fats, malai is what you need if you suffer from under-eye discoloration.

PROCEDURE- Simply dab and massage a tbsp. of fresh milk cream using your ring finger (for it is the gentlest in massaging) carefully on your under-eye area. Do not let it enter your eyes. If it does, wash off immediately. That’s it. Sleep with it. In the morning, you can wash it off. Let it work its magic overnight. Continue every night for at least a week. It shows results and how! I vouch for this method provided it is followed painstakingly and regularly. And yes, it softens the area too. Double-whammy, did I hear you say that?

2. ALMOND OIL- Here comes the weapon that has been relied upon since times immemorial to banish those dark circles- Almond oil. Shouldn’t there have been drumrolls in the background as I introduced it?

Coming to its virtues, almond oil is anti-inflammatory, thus it reduces puffy bags under the eyes and dark circles. It is a good source of vitamin K, which improves clotting, reducing discoloration under the eyes.

PROCEDURE- Application is simple. Simply slather and massage the under-eye area with almond oil (few drops) every night dedicatedly without fail for at least a fortnight. Sleep with it and let your skin repair itself overnight.

3. EXTRA VIRGIN OLIVE OIL- If almond oil has made an appearance on this list, can EVOO (Extra virgin olive oil) stay far behind? EVOO is the best grade of olive oil for it is least processed and contains maximum nutrition. It comes in glass bottles and is higher than all other variants. It works wonders in allaying wrinkles. Ladies approaching their twilight years can still shed a few years of age off their skin with the help of this wonder oil.

PROCEDURE- Massage a few drops of it on your under-eye area. Please note that massaging is important. That is what matters else the oil will merely sit on your skin and not nourish it the way you want to. Do this every night for 5 minutes gently for at least a fortnight. You will be spellbound with the positive turn of events.

4. GREEN TEA BAGS- Packed with a number of antioxidants, green tea helps banish dark circles and keeps them at bay for as long as you continue sipping (or as I do, gulping) it.

PROCEDURE- Put two green tea bags in the refrigerator for at least an hour. After that, keep them on your eyes. It’s alright if it’s not entirely on your under-eyes. It nourishes eyelashes too so, you have the best of both worlds there.

5. CUCUMBER JUICE- Not only is the cool cucumber (you surely would have heard the phrase ‘as cool as a cucumber’) rich in vitamins and minerals which helps to hydrate, nourish and tone skin, but also brighten the under eye area, so that you can say ‘good bye’ to those pesky dark circles permanently. What needs to be done?

PROCEDURE- Mince a cucumber into a few slices. Actually, two would do. Freeze them for half an hour and then, keep them on your eyes. Bid farewell to all those woes pertaining to your under-eye area.

Editor’s Note: Those are fab tips Nidhal. I swear by almond oil, I am currently using the Cold Pressed Sweet Almond Oil and 3 drops are more than enough! Also just wanted to add, be careful when using the oil, make sure you don’t go too close to the eyes or it doesn’t enter inside, it kind of blurs vision for the entire night :/ Also I recommend the Rogan Badam Shirin, it’s the most economical and easily available option when it comes to purity.

Image Sources: 1,2,3,4,5

Have you tried any of these for under-eye discoloration? What do you swear by?

Grab these spices from your kitchen to whip skin recipes

Grab these spices from your kitchen to whip skin recipes

By Nidhal

“What goes on your skin, goes in your skin” is the mantra that we Indians swear by when it comes to skin care. Naturally, we believe in ‘feeding’ in our skin. And since nutrition is best derived in its unprocessed, raw and virgin state from nature with minimal processing, it is small wonder that we Indians nourish our skin to the bounties of nuts, fruits, herbs and everything natural!

On that note, let’s give all Non-Indians a sneak-peak into the spices that Indians incorporate into their skin care regimen. Sounds a good idea or should we better keep our treasure trove well-guarded? Let us be benevolent for a moment and spill the beans today.

1. TURMERIC- I am pretty sure there’d be hardly any Indian mother who wouldn’t have prepared/recommended/forcefully slapped a mask predominantly yellow in colour on their kid’s face while the poor child would’ve either succumbed to her persuasion or hid himself/herself to avoid being daubed that weird-looking and (apparently) unpleasant-smelling mask. Ask any Indian mother on the virtues of turmeric and brace yourself for information will flow at a pace that even Google would hide in shame!

Let me summarize why turmeric is our go-to spice. Turmeric helps one bid adieu to skin hazards such as acne, wrinkles, fine-lines and imparts a bright skin tone. Face packs made up of turmeric not only help to clear acne scars and inflammation, but also diminish excessive oil secretion by the sebaceous glands. It should then not come as a surprise that, Hindu weddings have a ceremony devoted to haldi application in order to impart a winsome glow to the bride as well as groom’s face.

A word of caution from my side. Please use either Amba Haldi or kasthoori manjal/haldi only for skin care. They are exclusively meant for skin care. The one in your masala daani is meant for pakoras not packs. Kasthoori haldi/manjal (whatever you prefer to call it) can be easily purchased online. I would recommend Dhathri’s Kasthoori manjal that is, priced at 25 INR for 50 grams.

2. CLOVES- In order to incorporate cloves in one’s beauty regimen, one has to invest in clove oil for that is how its bounties are harnessed. Clove is highly potent for obviating acne and removal of scars left by the same. It is to be applied topically to the affected areas. It is often blended with face packs or massage creams for application on the skin. It gives a tingling sensation when applied. The reason behind this tingling sensation is the potent nature of clove oil.

Skin woes, such as blackheads, whiteheads, scarring, pimples and scaly skin are signs that characterize the skin ailment known as acne. Acne commonly happens during adolescence due to hormonal imbalance. So, if you’re pestered by acne, ditch those over-the- counter medicines and invest in an organic brand of clove oil or you can crush some cloves, add a heaped tbsp. of besan and rose water and voila! Bid adieu to this pesky skin woe!

3. CINNAMON- Next comes the saviour of acne-prone skin. It is tingling but boy, it is effective to the hilt. Cinnamon (Dalchini in Hindi) delivers fantastically when it comes to speeding blood circulation which makes your skin breathe thereby removing acne. This is done by drying the skin and bringing blood and oxygen to the outer skin surface. Thanks to its anti-fungal and anti-bacterial properties, cinnamon helps enhance one’s complexion.

However, please always use only a pinch (one-eighth a tbsp.) of cinnamon as a little over that can sting your skin excruciatingly. Personal experience corroborates this. So, do not go overboard 🙂 Just add a pinch of it to all your face masks and you will be good to go.

4. GINGER- Being a potent antiseptic and cleansing agent, ginger helps in keeping the skin clean, smooth and free of blemishes. Besides that, it also invigorates and stimulates one’s skin. It is the best natural acne-fighting weapon as it minimizes the rate of acne formation and eruption by killing and clearing the acne-causing bacteria. Acne-prone ladies, did I see your eyes dilate on discovering the perfect weapon to kick away those acne scars?

The next time you go grocery shopping, you have your reasons to add ginger to your shopping cart, right? Do not just brew it in your tea, let your skin savour its virtues externally too 🙂

5. SAFFRON- Now, comes the spice from the Northern corner of our country which we fondly call ‘Heaven on Earth’- Kashmir. Although this spice is going to be a bit straining for your pockets, yet its beauty benefits will compel you to turn a blind eye to its price at least once. Okay, enough of this ‘Guess my name’ game.

The spice I am talking about is kesar and this is an elixir for our skin. Is there seriously anything that this wonder spice doesn’t do? From imparting an enviable glow to one’s complexion to treating acne, blemishes and blackheads thanks to its anti-fungal content, from softening skin to making it supple, this spice is a must-have (at least 1 gm) in our beauty stashes.

Feel free to add 2-3 strands of it in whichever pack you whip. Let it stay undisturbed for half an hour and once the colour changes to yellow, it is a prefigure to not only slather it on your skin but also that you have bought authentic saffron.

Image Source: 1,2,3

Editor’s Note: Loved this post Nidhal. Have used Cinnamon, turmeric and honey a lot!

Do you use these spices for DIY skincare recipes?

How To Do A Simple Face Clean-Up At Home

How To Do A Simple Face Clean-Up At Home

Hi guys,

I don’t generally go to salons for facials and clean ups, I prefer taking care of my skin at home and follow the basic skin care routine regularly. If you spend even 5-10 minutes on your skin daily and the scrub/mask routine once/twice a week, you won’t need any fancy or expensive salon facials/clean ups.

Now a clean-up is important coz sometimes the blackheads and whiteheads are not really visible but they do develop when the pores are blocked or there is dirt in the pores which is not cleaned regularly.

Here is how I do a mini clean-up at home:

1. Wash your face with a face wash. My Holy Grail is the Himalaya Herbals Purifying Neem face wash.

2. Cleanse your face with a milk based cleanser. Now there are quite a few options available, you can also try the Himalaya Herbals Refreshing Cleansing Milk. Massage for a minute to two and wipe it off with a damp cotton ball

3. Take steam on the face. If you don’t have a steam machine, just boil some water and bend your face over it covering with a towel. It will do the job equally well.

4. Extract comedones, either use cotton on both of your hands to press the skin and extract it or use a blackhead extractor for deep rooted blackheads. You get it for about 50-60 rupees. Just sanitise and clean it before using and even after using.

5. Scrub your face. I use the Himalaya Herbals Purifying Neem Scrub when I am breaking out or have 1-2 acne or the Himalaya Herbals Gentle Exfoliating Walnut Scrub if my skin is a little dry or in winters. Scrub for a good 2-3 minutes concentrating more on nose, forehead, chin, sides of nose, etc. Wipe it all off with a damp cotton ball.

6. Toner. You can either use rose water or cucumber water or any alcohol free toner to close the pores. It is very important to close the pores which have opened with the steam.

7. Follow it up with a face pack. Now again I would go with either the Himalaya Herbals Purifying Neem Face Pack if I have acne or the Himalaya Herbals Fairness Kesar Face Pack if I want to get rid of tan. Keep it for 10-15 minutes and also use cotton balls soaked in rose water over the eyes and just relax. Take it all off with a damp cotton ball. Wash your face with water if you feel like.

8. Moisturize your face with your regular moisturizer.

9. Apply a sunscreen/sunblock

That’s it, you are done. This whole procedure will take about 30 minutes including the face pack. You can do it once a week on a Saturday or Sunday, you can spend at least 30 minutes in a week over your skin, if not, once in two weeks is a must! Also if you do not do it regularly, the whiteheads and blackheads will not be extracted, the skin won’t be exfoliated. Dead skin cells will form a layer and the blackheads will turn to acne.

Regular skin care is important even if you have good skin, to maintain it. Do not take your skin for granted. Your skin gets regenerated every 21 days, so at least follow this simple clean-up at home once every 2 weeks i.e. 14 days.

Few points to remember:

1. Always use products according to your skin type or how your skin is behaving during that time.

2. Do not be harsh on your skin, do not scrub vigorously or over exfoliate.

3. Always end with a sun block/sunscreen even if you are not stepping out

There are a lot of products available in the market if you do not have extra time to DIY at home. I like Himalaya Herbals products and have been using them since my college days. They are affordable and easily available.

You can check out Himalaya Herbals on Facebook HERE and on twitter HERE and also more from their Face Care Range HERE

How do you do a clean-up at home?