Tag Archives: DIY Skincare

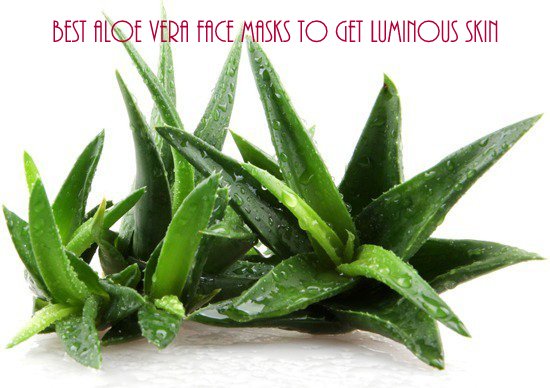
Best Aloe Vera Face Packs to get Clear, Glowing Skin

Best Aloe Vera Face Packs to get Clear, Glowing Skin

Best Aloe Vera Face Packs to get Clear, Glowing Skin

By Nidhal

It’s juicy. It’s succulent. It’s tender. It is a magic potion for your skin and hair. If consumed on a regular basis, it endows your body with a whole range of vital nutrients. It comes packed in tubs, tubes and bottles but that’s as good as a paper airplane in the name of defence equipment! It’s not real. Raw/real Aloe vera displays the tendency to turn stale within half an hour of being extracted.

Naturally the one in tubs, tubes or bottles would either be conspicuously fake or pumped with an overwhelmingly large number of chemicals. In the name of revitalising our skin, why then go for something that is just gel and nowhere as nourishing as our real Aloe Vera is?

Today, I will enlist a few tried-and- tested face masks with real Aloe Vera that you can easily whip at home to nurture your skin from within

1. ALOE VERA & HONEY MASK

The secret of Aloe Vera lies in its long, tender, succulent leaves – it is this gel that makes aloe vera a magical plant. It contains a host of beneficial compounds like polysaccharides, lectins and mannans etc. The main constituent of Aloe Vera is water but it also packs inside a bulk of minerals, vitamins and many active compounds which will leave your skin nourished and refreshed.

Honey, on the other hand, being a humectant (moisture binding agent) traps in moisture and doesn’t let your skin feel dry or stretchy.

PROCEDURE- Simply extract the gel of a whole Aloe vera plant and add half the quantity of raw (preferably Manuka) honey to whatsoever quantity of Aloe Vera gel you’ve extracted. Mix, apply and wash after 15 minutes. Since the mask contains honey, it won’t dry up solely so, there’s no point in sitting with it for hours. At most, half an hour is suggested after which Aloe vera would tend to be infested by bacteria.

2. ALOE VERA & CURD MASK

Known to be a peerless retainer of one’s skin’s firmness, Aloe vera in combination with curd that has lactic acid and hence, efficacious in lightening scars, spots, freckles, marks, blemishes, etc. is a wonderful mask to kick away spots and dullness. It also raises radiance.

PROCEDURE- As usual, extract the gel of an Aloe Vera plant (a single leaf would be sufficient) painstakingly and add two tbsp. of curd to it. Mix both well, massage on your skin gently and let it stay for 15-20 minutes or till it gets dry completely. Wash off with ample cold water to reveal brighter and energised face.

3. ALOE VERA, BESAN & HALDI POWDER MASK

The humble Aloe Vera gel has anti-microbial properties which spells cheer. Why? Because that makes it ideal to treat acne and pimples. Did I just see acne-prone ladies cavort excitedly on reading this? Besan helps to sort sallow complexion thereby evening out skin tone. Haldi makes for an excellent instant skin brightening ingredient that you just cannot skip in this recipe. I would suggest using either Kasthoori Haldi or Amba Haldi because these two variants are exclusively crafted for skin care and won’t turn your skin yellow if applied a little in excess (of course, don’t add an entire pack of Haldi just to ascertain the level at which your skin would turn yellow)

PROCEDURE- Simply extract Aloe vera’s gel off a leaf. Add a tsp of Kasthoori haldi or Amba haldi as well as besan. Mix well, apply and wash off within 15-20 minutes. Do not keep any Aloe vera face mask for more than half an hour. It gets infested by bacteria. You may not feel it but its nutritive value surely diminishes.

4. ALOE VERA, MILK & RICE FLOUR MASK

This mask comes to rescue to those who are battling sunburns. Aloe vera helps reduce inflammation and when teamed up with milk (that is high in lactic acid which lightens blemishes and deep cleanses skin) and rice flour (which helps to even out complexion), there’s surely no way your sunburn would stay for long.

PROCEDURE- Simply mix adequate amount of raw Aloe vera gel in a tablespoon of rice and  little milk (enough to liquefy) the resulting mixture and smear it liberally on your skin. Once dry, splash cold water and scrub it gently to remove it. Voila! Someone’s glowing.

Editor’s Note: Loved this! I love curd & honey, definitely trying first two <3

Do you use aloe vera in your DIY face packs? How do you use it?
Summer Skin Care Tips & Home Remedies

Summer Skin Care Tips & Home Remedies

By Rashmi

Hello lovelies,

Summers are back and with a bang. Nobody likes summers as they bring with them innumerable skin woes. But don’t you people worry. I have got it all covered for you people with easy solutions to keep your skin fresh and glowing. Thank me later

1. SUNSCREEN –

Use sunscreen whenever you are going out and make sure it is at least SPF 30 or choose from what suits you. Sunscreens protect your skin from harmful UV rays and prevent it from getting damaged.

2. CLEANSER –

The cleanser helps to unclog pores and it should be used as a part of a skincare regimen. During summers it becomes even more important to use a cleanser as the skin becomes lifeless and the pores get clogged. Make your own cleanser by mixing yogurt and honey. Apply it on your face and let it stay for 20 minutes and then wash it off to get clear skin.

3. EXFOLIATE –

Exfoliation is a must for the skin. Dead skin needs to be removed as they make the face look dull. Make your own exfoliator by mixing oatmeal, honey, and milk. Apply it on the face and let it sit for 10 mins then start scrubbing the face gently with wet hands. Scrub slowly for 5 minutes and then wash it off with water.

4. TONER-

Toners make you feel refreshed instantly. Make a refreshing toner by simply mixing cucumber juice with rosewater. Store it in the refrigerator to give it a longer life. Though use it only for a week and then make a new one. Carry it with yourself when going out. Spray it on your face to give your face instant relaxation.

5. MOISTURISE –

This step is what many people avoid during summers. Change your moisturiser to an oil-free one. Moisturisers are required by the skin in every season. It becomes even more important to use a moisturiser after exfoliation to lock the nourishment back into the skin. Mix your night serum with your moisturiser and apply it to your face to give the skin all the goodness that it needs.

6. KEEP YOURSELF HYDRATED –

Drink as much water as you can. During summers this is certainly the most important thing. Drink a minimum of 8 glasses of water a day. And do not wait for your mouth to get dry. Try drinking refreshing juices like watermelon juice or lemon water.

RANDOM SKIN CARE TIPS-

1. Rub ice all over your face to instantly soothe your skin. But make sure you cover it with a muslin cloth, never apply ice directly to your skin.

2. Apply calamine lotion to soothe skin rashes.

3. If you are out of toner, simply apply cold rosewater on your face to calm and soothe the skin.

4. Avoid oily and fried food. Include lots of fruits and veggies in your diet.

Editor’s Note: These are such basic things Rashmi, but we always tend to take them for granted. Articles like these remind me to follow things sincerely. One thing I would like to add and which I also follow is carrying a thermal spring water and spritzing it time and again, be it Avene, Vichy, La Roche Posay,etc.

Image Source: 1,2,Getty

Do you follow all these summer skin care tips?

DIY – Makeup Setting Spray

DIY – Makeup Setting Spray

By Sanchita

Makeup setting spray plays a very important role in the application and setting of base. In fact, this is the reason the makeup looks so flawless and does not budge for a long time even during scorching heat. You have often seen the matte or dewy look on various celebrities and how impeccable it looks! It also helps in removing the cakey or any patchy look in case you applied the powder or foundation in excess. Sadly, not many Indian brands manufacture makeup setting sprays and therefore the other brands are quite expensive. One day, I was having a casual chat regarding makeup setting with my friend who is a makeup artist and she told me how she sets the makeup on her clients. She uses a concoction liquid of certain ingredients which are readily available in the market and I was so determined to make it. In fact, you can also make two different setting spray – one for dewy and the other for matte. So, scroll down to see how to make your own makeup setting spray.

INGREDIENTS

  • Rose water – act as a toner, moisturizer and skin enhancer.
  • Aloe Vera Gel – helps in setting the look without getting patchy or cakey.
  • Glycerin – moisturizes the skin and evens out the makeup. Acts as a sticky base to keep the makeup adhered to
  • Distilled Water
  • Empty Spray Bottle

PROCEDURE

  • Take an empty spray bottle and make sure it is completely cleansed, sterilized and dried. Fill 1/3rd of the bottle with distilled water.

  • Add 2/3rd rose water to the bottle.

  • Add 1 tbsp. of Aloe Vera Gel.

  • Now, add 1/2 tbsp. of glycerin or any other essential oil of your choice.

  • Shake the bottle very well so that the ingredients are thoroughly mixed.

  • Voila! Your makeup setting spray is ready!

Note: If you want to make the spray for matte finish, use the distilled water and rose water in a 50:50 ratio and add only little bit of glycerin. However, if you want to make the spray for dewy finish, use the distilled water and rose water in a 20:80 ratio and add 1tbsp. of glycerin. Also, you can add Jojoba Oil or any other essential oil to increase the hydration factor during winter.

Caution: If you’re allergic to any of the above mentioned ingredients, please do not incorporate them in the concoction.

This can also be used a toner and refresher in this scorching heat. Simply spray the liquid from a slight distance, closing the eyes and let is dry on its own. Also, do not spray too much as it will take a long time to dry up. It is free from chemicals and preservatives and hence it is best to use it up within 1-2 months of making.

Editor’s Note: This sounds amazing Sanchita, definitely worth trying. I am surely going to.

Will you try this DIY Makeup Setting Spray?

DIY Facial Serum for Night

DIY Facial Serum for Night

By Sanchita

To begin with, I have extremely sensitive, acne prone, oily skin that is always on the verge of breakouts. Due to this reason, I avoid moisturizers (except for aloe vera gel) all my life. However, as I am approaching towards late 20s, I have been noticing that the texture of the skin looks very unhealthy and that natural glow is missing somewhere. Hence, I wanted something to rejuvenate and nourish the skin. After searching high and low for all the ingredients that works on acne prone skin without giving much trouble, I made this night serum for myself and to my surprise, I did work! I have been using it past a month and thankfully I observed some good changes in my skin. Firstly, it never broke me out and also nourished the skin. Secondly, it hydrates the skin throughout the night with getting oily or greasy. So, here goes the night elixir for acne prone skin.

INGREDIENTS:

  • Aloe Vera Gel – you can either take it directly from the plants and blend it smooth to have the gel consistency or simple buy one!
  • Jojoba Oil – Works wonder for oily acne prone skin. You can also substitute it for Avocado OR Almond Oil for preference.
  • Rose Water – either homemade or store-bought will work.
  • Vitamin E Capsule – easily available across the counter otherwise you can also opt for Vitamin E oil.
  • Sanitized Bowl – since it is a face product, it is better to have a sanitized place to start with and then transfer it to a dropper bottle or any container.

STEPS

Step 1
  • Add 1 tbsp. of rose water in the bowl.
Step 2
  • Next, add 2 tbsp. of aloe vera gel. Mix it thoroughly as both the ingredients have different consistencies and takes effort to blend well. You can also add 1 tbsp. if you want a runny consistency but I wanted sort of a slightly thicker one, so I added 2 tbsp.
Step 3
  • Add 2-3 drops of Jojoba Oil and again blend it in.
Step 4
  • Lastly, take out 1-2 Vitamin E Capsules and poke them to take out the oil. Add the mixture very comprehensively unless you see a uniform consistency without any lumps.
Final outcome
  • And Voila! You night serum is ready!

TIP: Do not make it in a large quantity because it is handmade and hence, the preservatives are missing. Make it enough for a week or two at the most.

FOR DRY SKIN – Since dry skin or mature skin needs more than just aloe vera gel, they can use shea butter or cocoa butter instead of aloe vera gel. They can also incorporate the essential oils like Almond, Rosehip, Grapeseed, etc. as per their own preference.

BENEFITS OF THE INGREDIENTS –

  • Vitamin E – Vitamin E is the main ingredient I would vouch for. It has excellent properties to revive and renew the skin cells at night. It treats the scars and marks on the skin due to ageing or acne. Being a great moisturizer, it nourishes the skin well without making it greasy or clog the pores when applied. It soothes and treats the sun burns and regular tanning of the skin. Most prominently, it make collagen that decreases the rate of aging signs like wrinkles, fine lines, etc.
  • Aloe Vera Gel – this is the HG for every oily skin. Seldom moisturizers suit us and we always find our way back to this. Aloe Vera, known as “plant of immortality”, it has numerous benefits for skin. It moisturizes the skin, heals the scars and soothes the skin from acne and nourishes without any greasy layer which gets absorbed in a jiffy. It also lightens skin pigmentation and slows down the ageing sign.
  • Jojoba Oil – it is known to fight wrinkles, stretch marks and cellulite. With high amount of ceramides which cover skin cells, it hydrates and nourishes the skin like no other. Oily skin doesn’t go well with other oils but this is an exception. It is so light weight and gets blended very easily. It also has anti-bacterial properties that treats acne and allergies.
  • Rose Water – the beauty of rose water in indefinite. From toner to face packs, makeup setting spray to hydration – it can do everything. It treats acne, soothes the skin from sun burns, refreshes and invigorates and has many anti-inflammatory and anti-oxidant properties for sensitive skin.

Do let me know how you liked the DIY.

Editor’s Note: I swear by Vitamin E capsules, but they are so sticky and messy while applying. I guess the mix of rose water and aloe vera gel will make applying Vitamin E easier. Also I am all for essential oils, I love using them. Definitely trying this Sanchita.