Tag Archives: Do It Yourself

DIY Facial Serum for Night, Acne Prone Skin, Indian Beauty Blog, Skincare

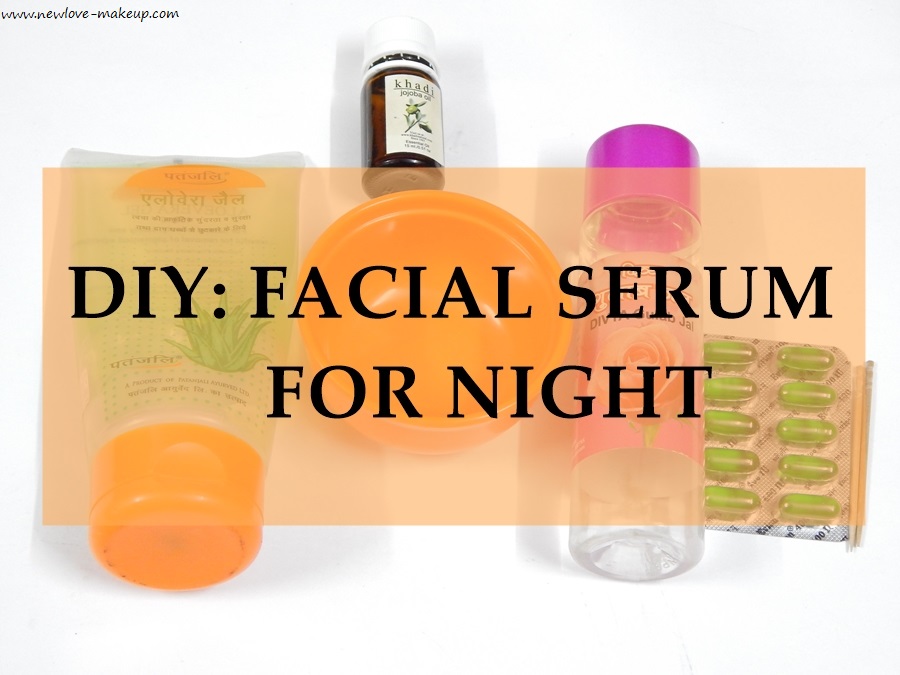
DIY Facial Serum for Night

DIY Facial Serum for Night

By Sanchita

To begin with, I have extremely sensitive, acne prone, oily skin that is always on the verge of breakouts. Due to this reason, I avoid moisturizers (except for aloe vera gel) all my life. However, as I am approaching towards late 20s, I have been noticing that the texture of the skin looks very unhealthy and that natural glow is missing somewhere. Hence, I wanted something to rejuvenate and nourish the skin. After searching high and low for all the ingredients that works on acne prone skin without giving much trouble, I made this night serum for myself and to my surprise, I did work! I have been using it past a month and thankfully I observed some good changes in my skin. Firstly, it never broke me out and also nourished the skin. Secondly, it hydrates the skin throughout the night with getting oily or greasy. So, here goes the night elixir for acne prone skin.

INGREDIENTS:

  • Aloe Vera Gel – you can either take it directly from the plants and blend it smooth to have the gel consistency or simple buy one!
  • Jojoba Oil – Works wonder for oily acne prone skin. You can also substitute it for Avocado OR Almond Oil for preference.
  • Rose Water – either homemade or store-bought will work.
  • Vitamin E Capsule – easily available across the counter otherwise you can also opt for Vitamin E oil.
  • Sanitized Bowl – since it is a face product, it is better to have a sanitized place to start with and then transfer it to a dropper bottle or any container.

STEPS

Step 1
  • Add 1 tbsp. of rose water in the bowl.
Step 2
  • Next, add 2 tbsp. of aloe vera gel. Mix it thoroughly as both the ingredients have different consistencies and takes effort to blend well. You can also add 1 tbsp. if you want a runny consistency but I wanted sort of a slightly thicker one, so I added 2 tbsp.
Step 3
  • Add 2-3 drops of Jojoba Oil and again blend it in.
Step 4
  • Lastly, take out 1-2 Vitamin E Capsules and poke them to take out the oil. Add the mixture very comprehensively unless you see a uniform consistency without any lumps.
Final outcome
  • And Voila! You night serum is ready!

TIP: Do not make it in a large quantity because it is handmade and hence, the preservatives are missing. Make it enough for a week or two at the most.

FOR DRY SKIN – Since dry skin or mature skin needs more than just aloe vera gel, they can use shea butter or cocoa butter instead of aloe vera gel. They can also incorporate the essential oils like Almond, Rosehip, Grapeseed, etc. as per their own preference.

BENEFITS OF THE INGREDIENTS –

  • Vitamin E – Vitamin E is the main ingredient I would vouch for. It has excellent properties to revive and renew the skin cells at night. It treats the scars and marks on the skin due to ageing or acne. Being a great moisturizer, it nourishes the skin well without making it greasy or clog the pores when applied. It soothes and treats the sun burns and regular tanning of the skin. Most prominently, it make collagen that decreases the rate of aging signs like wrinkles, fine lines, etc.
  • Aloe Vera Gel – this is the HG for every oily skin. Seldom moisturizers suit us and we always find our way back to this. Aloe Vera, known as “plant of immortality”, it has numerous benefits for skin. It moisturizes the skin, heals the scars and soothes the skin from acne and nourishes without any greasy layer which gets absorbed in a jiffy. It also lightens skin pigmentation and slows down the ageing sign.
  • Jojoba Oil – it is known to fight wrinkles, stretch marks and cellulite. With high amount of ceramides which cover skin cells, it hydrates and nourishes the skin like no other. Oily skin doesn’t go well with other oils but this is an exception. It is so light weight and gets blended very easily. It also has anti-bacterial properties that treats acne and allergies.
  • Rose Water – the beauty of rose water in indefinite. From toner to face packs, makeup setting spray to hydration – it can do everything. It treats acne, soothes the skin from sun burns, refreshes and invigorates and has many anti-inflammatory and anti-oxidant properties for sensitive skin.

Do let me know how you liked the DIY.

Editor’s Note: I swear by Vitamin E capsules, but they are so sticky and messy while applying. I guess the mix of rose water and aloe vera gel will make applying Vitamin E easier. Also I am all for essential oils, I love using them. Definitely trying this Sanchita.
Beauty Hack: DIY SCRUB BAR

Beauty Hack: DIY SCRUB BAR

By Sanchita

Scrubbing is extremely essential in winters as the development of dry skin needs to exfoliate to preserve then natural radiance of the skin itself. Honestly speaking, I prefer my winters with oversized sweatshirt, hot chocolate, a warm bed to snuggle in and reading a soul touching book. Yes, I am one of those lazy girls who like to keep the skin well-scrubbed of dead cells and yet do nothing about it. This is when a dear friend of mine told me to make a ‘scrub bar’ that would clean and exfoliate at the same time. My heart leaped with just with the thought of such multipurpose body care product and I immediately thought of making it. So it’s time, my dear readers of NLM, to let you know how to DIY this amazing thing!

Things you need:

  • Crushed soap bar. (a gel based one works better and easier to deal with)
  • Olive oil.
  • Glycerin.
  • Ground coffee. (not the instant one which blends in but the grounded beans for filter)
  • Empty container.

Steps:

Step 1

1. In a double boiler or on top of a boiling water, place the cut out pieces of the soap. Do not put it directly under the flames which would lead to burning.

Step 2

2. Once the soap melts in heat, simmer it down and add 2 tbsp. of olive oil and glycerin each. Then, mix it well with the liquid soap.

Step 3

3. Now add the coffee in it and again use a spoon to mix it well.

Step 4

4. Remove the mixture from the heat and pour in it the container. Now, this has to be done very quickly as the soap has the tendency to get sticky.

Step 5

5. Keep it in the refrigerator for 1-2hours. It also depends upon the soap on how much time it requires to solidify. Mine was done in 1hour.

Final

6. And you homemade scrub bar is ready to use!

P.S: You can also add big granules of sugar to exfoliate. Sugar is slightly coarser when solidified and hence I generally feel it is too rough for my normal skin but if you have dry skin, you can incorporate that. Also, you can make a separate scrub bar with sugar and walnut particles for feet as well.

As we all know, soaps are excellent in washing the dirt and therefore I added it to cleanse the skin. Olive oil and glycerin is extremely hydrating and hence, while scrubbing you will get the desired moisture to be restored. Lastly, the coffee particles are coarse and semi-fine milled which helps in exfoliation- gently and effectively. It stimulates the blood flow while scrubbing and tighten the skin thereby reduces cellulite and great for anti-ageing.

Overall, this has been a lifesaver for me. I imply invest less time for skin care yet get the best of it. Do let me how you liked my DIY.

Editor’s Note: This sounds amazing Sanchita and I love the coffee smell, definitely trying it out.

Have you tried making something like before? A DIY Scrub Bar? Will you try this? It’s easy peasy.

Four Yummy Homemade Body Scrubs

Four Yummy Homemade Body Scrubs
Many ingredients from your kitchen can be used to make yummy-smelling face, body, and foot scrubs at home. Start with a skin-friendly exfoliant, such as oatmeal, cornmeal, sugar, or salt. Then choose a moisturizing, binding ingredient. I recommend honey and avocado, which are non irritating emollients, for the face. Olive or coconut oil will work well on the body and feet, especially on dry, scaly, or flaky skin.

However, if you tend to get breakouts on your chest or back, skip the oils and stick with honey or yogurt.

You can add other ingredients as well, such as fresh citrus juice (which acts as an astringent) or cucumber (which soothes skin). For a more aromatic scrub, add some fresh herbs or a few drops of skin-friendly essential oils. I love dessert, so I like cinnamon or vanilla in my scrubs — if you’re a chocoholic, try adding cocoa!

Below are a few recipes to get you started on your own scrubs:

Simple Cinnamon-Vanilla-Oatmeal Facial Scrub
1/4 cup oatmeal
1/2 teaspoon cinnamon
1 teaspoon vanilla extract
2 teaspoons honey
1 tablespoon plain yogurt

Cornmeal-Citrus Facial Scrub
1/4 cup cornmeal
1 teaspoon fresh-squeezed citrus juice (lemon, lime, orange, or grapefruit)
2 teaspoons honey
1 drop ylang-ylang essential oil (optional)
1 drop ginger essential oil (optional)

Avocado-Strawberry-Sugar Body Scrub
1 cup sugar
1/4 cup mashed avocado
1/4 cup mashed strawberry
1 teaspoon olive oil
1 teaspoon honey
1 cup minced fresh basil
1 drop rose essential oil (optional)

Rosemary, Mint & Salt Foot Scrub
1 cup coarse sea salt
5 tablespoons olive oil
3 sprigs fresh rosemary (remove leaves from stalk)
1 cup minced fresh mint
3 drops peppermint essential oil (optional)

Mix ingredients together and gently scrub your face, body, or feet. Rinse with lukewarm water and pat dry.

Don’t they all sound so good enough to eat ! Yumm…the warm vanilla cinnamon..

Additionally you can scoop out a papaya or mango (or avocado) and save the fruit to eat later. Rub the inside surface of the skin all over your face and arms. The antioxidants and fruit enzymes will help soften your skin.

Source: 1

Whats your favorite homemade scrub ??