Tag Archives: how to

Natural Ways to Reduce Cellulite, Indian Skincare Blog,Indian Beauty Blog,Cellulite, How to fight cellulite

Natural Ways to Reduce Cellulite

Natural Ways to Reduce Cellulite

By Shelja

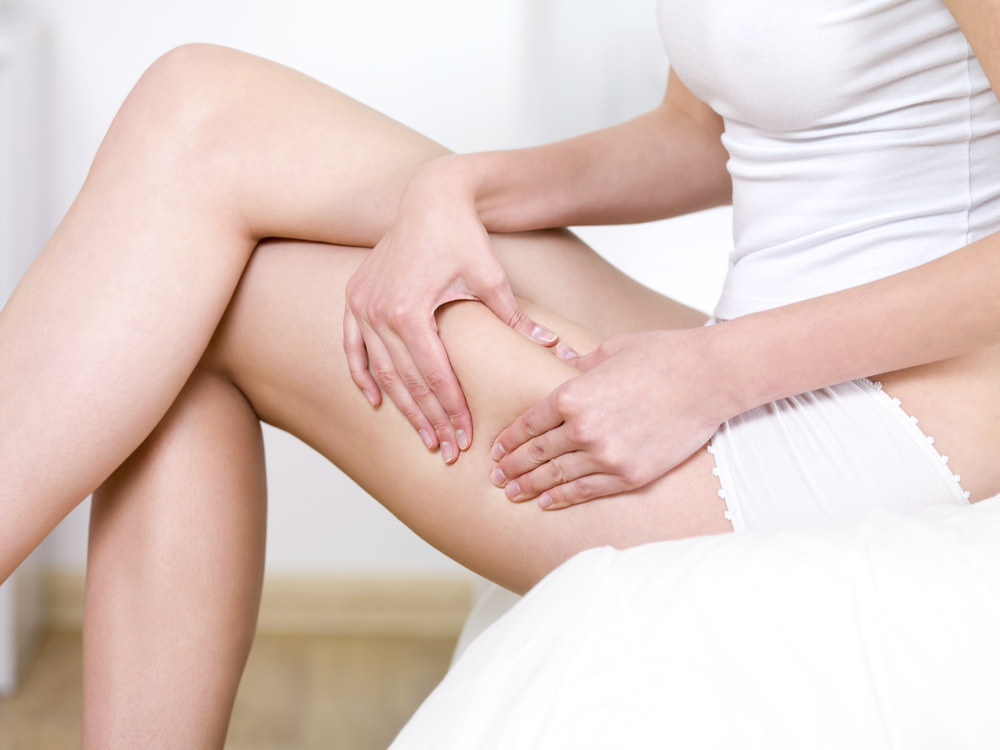
What is cellulite? Cellulite is dimpled skin popularly known as orange peel occurring mostly on thighs, buttocks and stomach area, every women has cellulite so you don’t need to feel embarrassed about it, its completely normal and natural. There are several reasons for cellulite some of the most common reasons include unhealthy eating habits, hereditary, hormonal, genetic factors and lack of exercise. There is no proven way to get rid of cellulite completely, however the tips given below will help you to reduce it. Keep reading!

1. Eat healthy : Diet plays an important role, the fat you consume will be stored in your body as cellulite, consuming clean healthy food will help you to stay fit, foods like grains contains fibber which will help you to remove waste and toxins from the intestine also shedding off cellulite stored as fat in your body. Along with this drink plenty of water as consuming water will also remove toxins and excess fat from the body.

2. Workout : Cellulite is a very stubborn fat, you have to understand that it will take time to get rid of it, however to speed it up it’s important to do cardio as often as you can. As cellulite is nothing but stored fat, burning those fat through cardio and leg exercises would be a wise decision.

3. Exfoliate : Exfoliating helps to promote blood circulation and sheds off dead skin cells, to see visible results it’s advised to use a coarse exfoliator before showers every day. If your skin is too sensitive give it one day rest so that your skin is repaired.

4. Massage : Massaging enhances the blood circulation in the body and provide oxygen to the cells, it helps the body to reduce cellulite in its own natural way. You can massage it with grapefruit essential oil, hazelnut essential oil or jojoba oil. Add 3 to 4 drops of the essential oil of your choice to a tablespoon of almond oil and rub and massage into your skin for a hydrated and firmer appearance. Do this every day for best outcomes.

5. Dry brushing : Massage your skin for a minute before you start dry brushing. Use a soft bristled brush, apply few drops of oil on the affected area then brush in small circular motions directed towards the heart until the skin sucks up all of the oil or till your skin turns red. Repeat the procedure every day to see visible results.

6. Use coffee grounds : Caffeine breaks up the fat deposits as you massage into the skin. It also tightens your skin making it firm. Drinking coffee daily will also help to eliminate fat. Prepare a wrap with coffee and olive oil mixture, heat one-half cup of coffee grounds and a little extra-virgin olive oil in the microwave for 20 seconds. Spread the warm mixture on the cellulite and cover it with plastic wrap. Leave it on for 30 minutes, and then rinse it off with Luke warm mixture. Repeat this 3 times a week to see visible results.

7. Anti cellulite cream : There are many creams targeted for cellulite, below is the list of best cellulite creams available.

  • bliss fat girl sleep
  • Clarins high definition body lift
  • bliss fat girl slim
  • Tarte celluFIGHT
  • L’Occitane – Almond Beautiful shape

Image sources : 1,2,3,4,5,6,7

How to Get Rid of Back Acne?

How to Get Rid of Back Acne?

By Shelja

Summers are full of adventure, beaches and sweat. Sure we all love summer holidays and other stuff but there is something which I hate about summers, The back acne! As summers are sweaty I end up with these crazy acne all over my back and forearms, Thank God I am not the only one facing it, the good news is, it can vanished! Every year in forced to keep a check on the tips given below to keep my back free from acne. Keep reading to know more!

1. Salicylic wash : Salicylic acid is popularly advised by dermatologist for acne and pimple prone skin, it is also know for its deep cleansing and rejuvenation properties, it also provides exfoliation and reduces dark spots caused by acne. Using salicylic acid on your back twice daily can have visible effects.

2. Benzoyl peroxide : This is a another strong ingredient to use on your back acne, as it dries off the skin it’s not recommended to use on your face without your dermatologist advice. If your using a benzoyl peroxide wash let it stay for atleast a minute befor you wash it off. Using a lotion of benzoyl peroxide over your back after the shower will get you faster results.

3. Keep it clean : if you notice back acne mostly occur during summers, sweat is also one of the many reasons for your back acne, shower right after you sweat, after gym or before bed.

4. Retino A : Retino A cream is used for acne and pimple treatment, it is also used for further prevention, you may notice some skin shedding within few days but that’s a normal process as it sheds off the old skin at the same time promotes growth of new skin cells. It also works good for wrinkles, age spots and skin lightening.

5. Don’t re-use worn clothes : Dirty clothes can cause clogged pores and thus causing acne, the best way is to wash your bra and tops after one use, especially during summers when you sweat the most.

6. Apply sunscreen : If your skin has acne scars sun can be your biggest enemy. As sun can make your acne marks last longer. The best way is to wear clothes which covers your acne area. use a oil free suncreen lotion over your back 20min prior of sun exposure. Sunscreen also helps to save your skin from unwanted tan and early signs of ageing.

Editor’s Note: Agree with all these points Shelja, well written. I do get it in summers sometimes.

Image sources : 1,2,3

Do you have back acne? How do you deal with it?

7 Things to learn from Coachella Festival

7 Things to learn from Coachella Festival

By Shelja

For those who are unaware of the Coachella festival, it is a music and art festival held annually in California and is one of the coolest concert to attend at the moment, every year many stars are spotted which made this festival so popular and WANTED! It has definitely increased the fashion standards ofcourse have inspired us with their fresh and unique style statement! Keep reading to know more.

1. Over accessorising is in : Over accessorising is a myth, wearing all of your wardrobe jewellery is the new trend, don’t believe me? Have a look at these moments stolen from coachella fest! I am amazed that wearing so many jewellery doesn't make them appear tacky or loud but unquestionably fashionable.

2. Vintage glasses : These sun glasses definitely reminded me of Gandhi ji’s eye glasses, it was a geeky piece or regular glasses back then, but who knew it will be on of the hottest glasses to buy at the moment. They are definitely a must have.

3. Crop tops : I am some where forced to believe that crop top was started from this fest, they look so fabulous and is now a THING in the entire world, the best part it’s comfortable as crop tops are usually loose, this is also the coolest fashion trend to follow in hot summers

4. Eyebrow art : During the 90’s in Indian weddings the bride use to apply white sticker/painted bindi over the eyebrows, I guess Bengali bride follow this ritual even today, if you love this I have a good news! You don’t need to be a bride to get that look, many people are getting that bindi look all over their eyebrows I feel it’s stolen from India’s ancient tradition, but is the new trend to follow!

5. Floral Head bands : This is one is my favourite! This look is feminine and delicate, again this is stolen from the brides, usually Christian brides are seen wearing a flowers head band or flowery hair do. In many images floral head band in paired with braids to get that bohemian look.

6. Long Cardigan with shorts : Cardigans are usually paired with jeans, wearing shorts along with a long cardigan is the new look, they make a perfect pair and definitely attract eye balls.

7. Hair chains : This is so fancy, ever since I was a child I wanted to do this! This makes me feel like I am a princess of Persia!! I really want to thank the person who came up with this very idea, this is so fashionably unique and looks so feminine, again this was traditionally used by Indian brides, usually it’s worn in silver colour and looks fabulous with women with black-brown hair. Haven’t own one? You should really consider it.

Editor’s Note: I totally agree with all these points Shailja, and loved the images.

Image sources: 1,2,3,4

What do you think of Coachella Festival? I think music festivals are when you can go all out and wear whatever you want 😀

Purple Duochrome Smokey Eye Makeup Tutorial

Purple Duochrome Smokey Eye Makeup Tutorial

Hey guys,

A lot of you asked me to do a look with the SeaSoul Eyeshadow Duo in Deep Purple that I got in my May Fab Bag, so here it is. I hope you like it 🙂

Products used:

Face:

Sephora Smoothing Primer
Revlon Nearly Naked Foundation (Buy Online)
Khuraira Orange Corrector
Lakme Absolute Face Stylist Concealer (Buy Online)
Lakme Absolute Face Stylist Compact
Marks & Spencer Limited Damson Blush
Revlon Nearly Naked Powder in Medium Deep to Contour (Buy Online)
MUA Undress Your Skin Highlighter Pink (Buy Online)
Colorbar Stay The Day Finishing Mist (Buy Online)

Eyes:

Faces Ultime Pro Eyeshadow Crayon in Staying Alive (Buy Online)
SeaSoul Eyeshadow Duo Deep Purple
Too Faced Chocolate Bar Palette (Milk Chocolate to blend and White Chocolate to highlight)
NYX Jumbo Eye Pencil Yogurt
Maybelline Colossal Superblack Kajal (Buy Online)
Essence Lash Princess Mascara
PAC Cosmetics Liquid Liner Pen (Buy Online)
Maybelline Fashion Brow Duo Brown

Lips:

Sugar Cosmetics Lip Crayon Holy Golightly
Sigma Lip Vex in Tint

Brushes: Sigma, Sedona Lace, Liz Earle, Colorbar

I have used the purple eyeshadow crayon as base and the deep purple eyeshadow on top of that. Concentrated the purple on the inner and outer corners to give a halo effect for the duochrome at the center.

Another way to use it would be the duochrome on the entire lid and the deep purple at the outer V and outer half of lower lashline only. That would also be slightly smokey but would have more concentration on the gorgeous duochrome. I would try that next.

I loved how the look turned up, do let me know your thoughts in the comments below. And also if you try either of the two looks, do tag me, I would love to see it.

DIY Homemade Hair Mask for Strengthening Hair

DIY Homemade Hair Mask for Strengthening Hair

By Nidhal

One can never run short of ways or ideas to pamper their crowning glory. There is a hairstyle or hair cut that you’d been thinking of getting at any point of time. There’d be those accessories that you’d be dying to experiment with. There would be hair products that you would have played with to give your tresses that bounce of life. But amidst all this, being Indians, we cannot never turn a blind eye to our Good Ol’ home remedies, can we?

So, why not treat our hair to the bountifulness of natural ingredients today and drool over them all over again? March straight to the pantry for there lies your paraphernalia for this DIY recipe.

INGREDIENTS NEEDED-

1. CURD- Enriched with the bountifulness of lactic acid, curd/yoghurt (called Dahi in Hindi) helps to eliminate dandruff, foul smell and dullness. It adds unprecedented gloss and softness that you just can’t get over.

2. TULSI POWDER- Being a plant that has been revered in Hinduism for centuries, Tulsi has benefits galore for your mane. It treats lice, dandruff, itchiness and scalp infections. Yes, your granny was right when she said that Tulsi is a miraculous plant. No questions asked anymore!

3. ALMOND OIL- Being a storehouse of Vitamin E, almond oil helps in locking moisture and adding that enviable sheen to your locks. Prefer organic/cold-pressed almond oil and not the ones that are laden with mineral oil. In my opinion, Almendrop 100% pure almond oil is a wise choice.

4. METHI/FENUGREEK POWDER- Now comes the wonder ingredient which cannot be done without. Methi helps to add shine in addition to imparting softness. It also accelerates the rate of growth of hair which spells cheer for those ladies waiting anxiously to flaunt long luscious locks. Opt for methi powder for grinding is a tad cumbersome and finely grinding takes patience (which sadly, today is a lost virtue).

PROCEDURE-

1. In a clean and dry bowl, add 5-6 tbsp of curd. This is the amount for shoulder length hair. Increase if you have longer hair.

2. Add 3 tbsp each of methi and tulsi powder.

3. Add half a tbsp. of almond oil

4. Mix well thoroughly to form a smooth and consistent paste.

5. Apply generously all over your scalp as well as length (of hair).

6. Wash off after 45 minutes with a mild herbal/organic shampoo. Condition if you feel the need to do so.

7. Repeat twice a week to expedite the results and acclimatise your scalp to these natural ingredients.

That is all for now, folks. Feel free to post your queries and results with me through the ‘comments section’ and try this DIY recipe to get locks which you cannot stop drooling over.

Pssst… It compels you to keep stroking your fingers down your mane intermittently!

Editor’s Note: This sounds really good Nidhal and methi and tulsi are very good for dandruff too. I am definitely trying this, have to get methi and tulsi powder now.

Have you tried this DIY before? If not, do so and let us know how you find it.

7 Denim Tricks You Cannot Afford to Miss!

7 Denim Tricks You Cannot Afford to Miss!

By Lovleen

Denims are a staple aspect of almost any wardrobe, and thus owing them is a no-brainer task. After all the versatility, comfort and vividity that they are able to deliver is phenomenal. But, wait aren’t you missing something? Well, though you have a huge collection of denim but are you happy with time? Does it make you a standout from the crowd? If not then this article is just for you. As here we will focus on some easy yet exclusive denim tricks and hacks that you help you reinvent the same old denim wardrobe the fashionable way. Because denim magic will never occur on its own, a little effort, innovative thought and creative tools can take your denim success a long way.

1. Start With Zipper Style

The usual denims that you wear can be taken as a layout which can be structured just the way you want with your creativity. This concept can be fruitfully used for transforming your denim into a zipper style denim. For this style all you need is a zipper, scissor and needles. First determine the area when you wish to place the zipper and then rip that area to create desired space for it. Consequently fix the zipper at the space and there you have it, a magnificent zipper style denim that speaks for itself.

Style Tip: Zippers can be fixed anywhere at the bottom of jeans, hips and thighs too, just let your creative mind do the job.

2. Denim and Shoes

Known to all Denims have remained to be a versatile asset in everyone’s wardrobe, so why restrict them with one type of shoes? Experiment with a plethora of shoes that you always wanted to wear, where women can have their sexy look with high heels, skinniest feel with boots, sporty touch with two roll flats and formal look with wedges, similarly men can make their move using the formal shoes, sporty running shoes, casual sneakers and many more,

Style Tip: Be careful with the colors that you pick and remember that the match up should always complement each other.

3. Lace It Up

This hack is just for the beauties out there, who can take their denim to a new dimension by lacing it up. Now, each one of us are a huge fan of laces then why not have them here too. Pick up the appropriate lace that you love, crop up your denim and stitch it up, it is as easy as it can get. But, the difference that it is going to create on the aesthetic appeal of the denim is something to watch out for. So, have you selected your perfect lace yet?

Style Tip: Lace is the key of this hack, go with black, cream, white or other self colors, avoid those that have amalgamation of various colors in one fabric.

4. Rip and Fill The Denim

Everyone is loves to have ripped denims, but now it's time to fill the ripped parts not with denim but a wide range of fabric. Fill this ripped areas with designs, patterns, fabrics or any other idea of your choice. If you do not have a ripped jeans then just take scissors to rip them off. Later, take the fabric that you want to attach with the denim and stitch it up.

Style Tip: Colors that you pick can be the reflection of your personality (black, blue, red) or the way you are (white, green, pink).

5. Sand and Stain Denim

Next style hack is an amazing one where you will have the ability to transform the aura of your denims. To do the stand and stain hack you are going to require a sand paper for sanding the denim, filer for scratching it and then a fabric marker for staining it. The stand and stain looks best near the hips and thigh region of jeans so it’s best to do them at its mid length. In this technique first you will have to sand the jeans with a sand paper for a while until the threads are visible and then scratch these threads with the help of a filer. Once the white inner threads of the sanded area are prominently visible then make sure of a fabric marker to stain these threads. Here, you can use any color depending upon what your styling preferences

Style Tip: Have the sand and stain area across different parts of the denim with variations in colors of the marker.

6. Crop the Denim

Bored with the same usual long pair of denim then why not crop them? Take the appropriate measurements, or the length until which you want to crop then and then go for it. During this process you can implement various designs through the art of cutting and stitching too. This means that by simply cropping an old denim you can bring it back to life but a new and refreshed look. Fashion experts believe that cropping a long denim is just like repairing it and bringing it to the gateway of unlimited fashion as its hard to go wrong with crop denims.

Style Tip: Pair crop denims with cool pair of shoes and tops to look your best and never forget those classy sunglasses.

7. Spray Vodka For Targeted Action on Stains

Presence of stains can hamper the aura of your denims, so it’s time to get rid of them with just a few sprays of vodka. Transfer the vodka into a spray bottle, and spray it on the stain for two-three times, allow it to dry and witness the stain disappear.

Style Tip: Regular care and maintenance is crucial for keeping your denim stylish and fashionable.

Editor’s Note: Absolutely love these hacks Lovleen. I would love to try the sanding, and also rip and fill.

Image Source: Google Images

Do you like these hacks? Have you tried them? I am definitely trying 1-2 😀

Home Remedies For Glowing Skin

HOME REMEDIES FOR GLOWING SKIN

By Rashmi

Hello peeps,

I am back with another DIY solution for your skin. Glowing skin is what everybody desires. People spend so much money by going to parlours. Though the effect of parlour treatment is almost immediate,is it long lasting? I don’t think so. I prefer using ingredients from the kitchen which are readily available.These are absolutely natural ingredients and are safe. And these things give a glow to your face like no other parlour treatment can give. And guess what? The results are permanent. When at first my mother asked me to use homemade face masks instead of going to the parlour i laughed at that but now after using all these homemade masks I am sure I am not going to the parlour for facials.

And I am sure these home remedies for glowing skin are going to work for you guys as well.

Happy reading ☺

1. Honey and lemon juice –

In a bowl take 2tbsp honey and mix in it 1tbsp lemon. Mix it well. Apply it on your face and leave it for 20 minutes.Wash it off with cold water. Lemon works as a natural bleach and honey gives instant radiance. One could also try applying just honey on the face. Honey and Lemon is perfect for removing your tan too.

2. Banana face mask-

In a bowl take half a banana(ripe),mix 1tbsp yogurt to it along with 1tbsp honey. Mix it well until the banana is mashed completely. You could add 2-3 drops of rosewater too. Now apply this face mask and leave it for 20-25 minutes before washing it off with water.Banana is best for getting glowing skin.

3. Tomato juice –

Simply mix tomato juice along with lemon and apply it on your face. Let it sit for 20minutes and then wash it off with plain water.Follow up with a good oil free moisturiser.

4. Olive oil or coconut oil-

People have this misconception that if they apply oil on their face, they will get pimples .This isn’t true. In fact either olive oil or coconut oil should be applied on the face for at least 10minutes before taking a shower. This is a really effective method to get that glow that you have always longed for.I follow this routine daily and this has worked effectively for me.

5. Potato and lemon juice-

Take the juice of half potato and mix in it about 1tbsp lemon juice. Apply this on your face daily for a week and you will be able to notice a beautiful glow on your face. Rub this mixture on your elbows too to get rid of dark elbows. This mix when used continuously for a week, will help get rid of all that stubborn tan.

6. Papaya face mask-

In a bowl take papaya and mash it well. Mix in it about 1tbsp honey, 1/2 tsp turmeric (you don’t want to be left with a yellow face instead of a glowing one) and 1tsp honey. Mix all the ingredients well and apply this on your face for 20 minutes and then wash it off. Apply rosewater on your face after that.

7. Milk and lemon-

Mix milk and lemon together. The milk should be unboiled. Apply this and you would get a radiant skin within a week. Milk helps to moisturise your skin and lemon helps in bleaching the skin naturally thus causing no side effect.

Additional tips-

1. For people with dry skin mix glycerine and rosewater and apply it on your face daily.

2. For people with oily skin mix gram flour(besan) with rosewater and apply daily. Alternatively fuller’s earth could also be used.

3. Apply aloe vera on your face daily .

4. Exfoliate your skin at least twice a week to get rid off the dead skin cells.

5. Always keep your skin hydrated and moisturised.

6. Always remove your makeup before going to sleep and apply your night cream.

7. Rub an ice cube on your face for an instant glow.

See more skincare tips/DIY HERE

Editor’s Note: These are easy and perfect everyday tips Rashmi. Glycerine and Rose water, I swear by. Even Fuller’s Earth, especially for summers.

Do you use these quick home remedies for that glowing skin? If not, do so now.

P.S: Images from Google.

Irresistible Me Ruby Auto Rotating Curling Iron Review

Irresistible Me Ruby Auto Rotating Curling Iron Review

Hi guys,

I have been trying this IrresistibleMe Ruby Auto Rotating Curling Iron since quite some time now. And I also did a video, but sadly the focus got wrongly locked and it is not in focus, though I uploaded it anyway, coz I worked quite hard on it. It might help someone 🙂

About the Ruby Curler:  The Ruby curling iron is an innovative rotating barrel with auto recovery function that gives you perfect curls every time.

The barrel is ceramic, fused with tourmaline to easily create silky, smooth curls. The diamond coating enhances its durability and heat transfer, unlike conventional ceramic irons.

The tourmaline gemstone is a natural source of negative ions and far-infrared heat, which provides faster styling.

Negative ions eliminate frizz and lock in moisture by closing the cuticle to create smooth, shiny hair.

The temperature remains constant curl after curl, allowing you to work quickly, while attaining consistent results.

But that is not all! The Ruby Curling Wand comes with an array of features that will make your life so much easier:

No frizzy hair – the tourmaline technology with negative ions leaves your hair smooth and shiny by sealing hair oils, color and moisture in
Fast heating (less than a minute) and variable temperature control (210C/410F)
Intelligent – the LED screen shows you the temperature you are at
It has an auto stand by feature after 1hour
1 year limited warranty

Price: $119

At first, it is very light and that’s the best part, coz curling hair takes about 20-25 minutes and if you use a heavy curler, the shoulders and hands pain very bad at the end of it.

The best part is the auto rotating, it makes life so much easier! You do not have to fold every section of your hair on the barrel and just sit and click on the ‘Right’ and ‘Left’ buttons, keeping your hands free 😀

Features
Directions

It comes with 5 different temperature settings i.e. 260,300,340,380 and 410 degrees in Fahrenheit. And the cord is pretty long and rotates 360 degrees, so you can move around or be in front of a mirror even if the switch is a bit far. It has universal voltage, so would work in all countries. It comes with US plug and you will need a converter if you want to use it here in India/or as per your country.

Since I have very thick hair and it’s in layers i.e some are short and some are long, it takes me about 15 minutes for loose beachy waves and about 25 minutes for smaller, tighter curls.

The barrel is 26mm and it heats up pretty quick, hardly takes a minute. I usually go for the mid temperature i.e. 340 and loose beachy waves.

I love the volume, I have pretty straight hair which is usually flat, and I absolutely love curls and volume on me! I use the BBlunt Curl Defining Leave in Cream before curling and use the L’Oreal Professionnel Beach Waves Spray after curling, still it stays on me only for a day. I won’t blame the curler here, it’s my hair! Coz that has happened even when lots of mousse was applied and I was given super tight curls during my engagement, not to forget ton of hair spray. But curls open up on my hair quickly and easily.

I also like IrresistibleMe’s Diamond Straightener and the 8 in 1 Curler, they also have a lot of different hair extensions and hair care products. I have a 10% off coupon code for you guys, it’s ‘IrresistibleBhumika‘ and is valid on the entire website www.irresistibleme.com

They have Free Shipping above $150, so below that, there would be some shipping charges. You can combine your order to get free shipping, I was not charged any customs duty on this.

Overall, I would say, it is very convenient and easy to use, and I definitely recommend it if you are looking for a good hair curler. It is slightly expensive but then the auto rotating feature is something which is it’s USP and makes our life easy! And the rotating feature is not seen in majority hair curlers, and you have to twist each section of your hair on the barrel each and every time.

What do you think of the IrresistibleMe Auto Rotating Curling Iron?

P.S: PR Sample. Honest Review

Flared Jeans: The Comeback of the 1990’s & Ways to Style It

Flared Jeans: The Comeback of the 1990’s & Ways to Style It

By Sanchaita

Flared Jeans were out-of-the fashion scene throughout the 2000’s, mainly because skinny and super-skinny jeans were winning hearts all over the world, and why not? They are extremely well-fitted and looked so good. But now, the fashion from the gone eras is making a comeback, be it Palazzo’s, Crop-tops, Flared Jeans, Midi’s, and so on.

In this article, I’m going to write about how to rock the Flared-Jeans and can look as good as skinny jeans, and is so much more comfortable than the skinny ones because let’s admit it, no matter how good a pair of skinny jeans look, they are too-tight to breathe-in and too uncomfortable during the harsh summer days, and yeah, we do need to shift to something different after years of wearing the same skin tight jeans!

The Summer-Spring Look

Flared Jeans can be paired up with a summer-top or even a crop-top. This outfit is perfect for a casual day out with friends, or for movies. Semi-fitted or well fitted tops will look better with the flared jeans as loose or ill fitted tops will fail to give some balance to your body, thus making you look shabby. Pair these jeans with wedges, and you’re good to go!

The Winter Look

Long sweaters and the flared jeans- best look for a chilly winter day. Pair this look with a matching accessory- a chunky necklace or earrings, and/or a handbag, with light makeup. With Flared Jeans, heels or wedges is preferred because if you wear flats instead, the bottom-part of the jeans will be dragging through the floor, and undoubtedly look bad.

The Distressed Look

Yes, ripped and distressed flared jeans do exist and look as good as ripped skinny jeans. Crop-top, spaghetti tops would look best with these pair of Jeans. This is the ready-for-Coachella kind of look. Hair tied into a messy pony or bun, and a sling, and you’re ready to rock!

The Cropped One

Cropped flared-jeans paired with a shirt and scarpin heels is one way to rock the bell-bottoms look. This look is great for formal settings, and jeans can be changed for flared pants, and it would look as good. Too-much cropped flared jeans/pants would look baggy.

The No-effort look

Pair the Jeans with a casual v-neck top, printed or plain, paired with sunglasses and a handbag/sling and you’re ready for a hot-summer day. This look is easy and for those days when you are feeling lazy and don’t really feel like dressing up.

The Kimono look

Kimonos are the current favourite. I see almost everyone around me wearing kimonos with a short-dress, with shorts, with skirts, and with a pair of skinny jeans. But, kimonos can be paired up with flared jeans and tank tops and they look great! If doesn’t matter if your kimono is plain or printed, try wearing it with a pair of flared jeans and you’ll do justice to the boho-vibes.

The other-colours look

Flared-Jeans doesn’t always have to be blue (the basic denim colour). It can be red, or black, purple or even pink. Go for your favourite coloured flared jeans, and rock it either with a solid coloured shirt or striped or even floral, because hey, bold is beautiful.

The Biker-Look

Who said leather jackets look good only with skin-tight jeans or pants? When you wear a leather jacket with flared-jeans, they not only look classy, but they add a bit of texture to your outfit as well. There are so many other ways to rock the flared-jeans, all you need to do is find the right pair of the flared-jeans, some accessories, be it sunglasses, scarves, chunky pieces of jewellery and you’re ready to conquer the world woman!

Editor’s Note: Oo..I love this compilation Sanchaita, I remember wearing my flared jeans a lot when I was in college 🙂 I am so glad it’s back.

What do you guys think of the flared jeans trend? And how do you prefer to style it?

How To Get Rid of Acne Naturally

How To Get Rid of Acne Naturally

By Rashmi

Hello girlies,

This is my first article in this space and i do hope that you all llike it . This being my first article I wanted to write about something that has troubled myself for years.Happy reading ☺

The most irritating thing about growing up is probably pimples.This had troubled me for years until i found a natural and permanent solution to cure it. Though natural remedies have a slower effect but they are permanent cures.I have been using these natural remedies for years and have a clear skin since then. So i thought of sharing these remedies with you all.

All you need to have is a bit of patience. I hope all these remedies works for you all as well. ☺

1. Fuller’s earth- In a bowl take about 4 tbsp of fuller’s earth. Mix 2tbsp of sandalwood powder and mix 1tbsp of turmeric powder into it. Add some rosewater and mix well. Apply this on the face and wash after half an hour. Continue using this face pack for 2 weeks to notice a difference.

2. Coriander leaves- Make a paste of coriander leaves and apply it on the effected area and leave it for 20-25minutes and then wash it off.Coriander leaves works effectively in curing acne.

3. Lemon- Mix lemon with honey and apply it on your face and leave it for half an hour and rinse off with cold water to get a clear skin.Lemon works great as a skin lightener too and is most effective in curing acne.

4. Garlic juice – Garlic juice is probably the most effective natural ingredient to cure acne, the only problem being that it stings really bad. Apply it for 15 mins and then rinse off with cold water and apply rosewater.

5. Black pepper – Mix crushed black pepper with rosewater. Apply on face and leave overnight. Wash it with lukewarm water in the morning.

6. Neem – Mix 2tbsp of neem powder, 1tbsp sandalwood powder and add a few drops of rosewater. Mix it well and apply it on your face. Let it dry and then wash it off.

7. Camphor – Camphor is known to cure acne.It reduces redness and itching. Mix 1–2 cubes of camphor (depending upon the size) and rose water and spray it on your face.This works as a great toner. This is the elixir for people with oily skin. Spray it on your face daily to get rid of acne.

Editor’s Note: I absolutely loved the tips Rashmi, never tried black pepper and camphor. Will surely give them a try

Have you tried these tips? What do you do to keep acne at bay?

P.S: Images from Google