Tag Archives: mumbai beauty blog

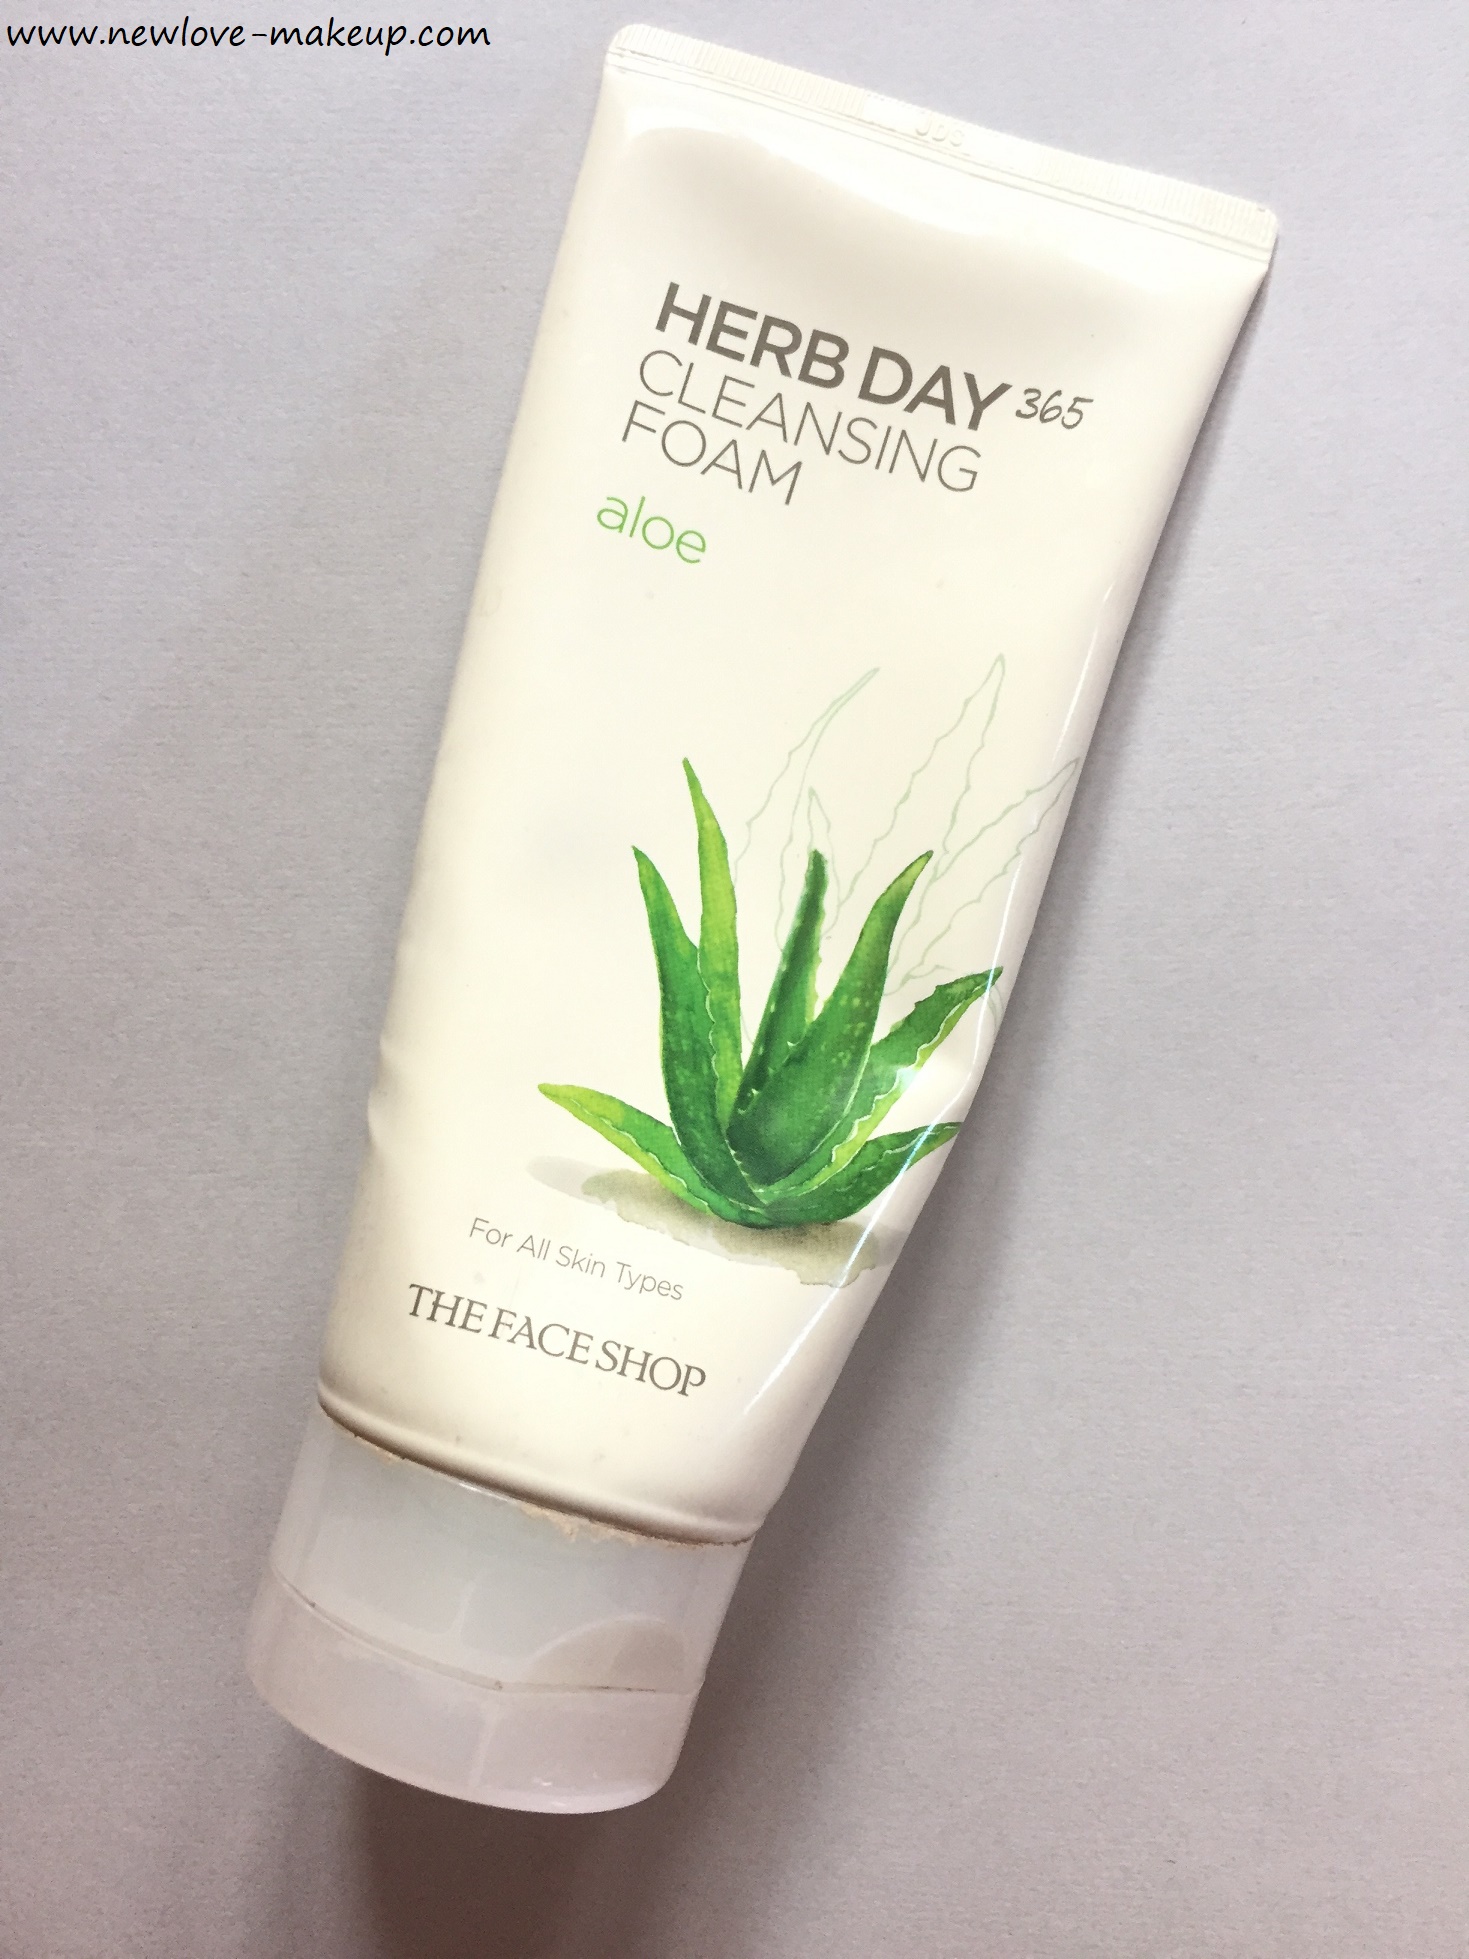
The Face Shop Herb Day 365 Cleansing Foam Aloe Face Wash Review

The Face Shop Herb Day 365 Cleansing Foam Aloe Face Wash Review

The Face Shop Herb Day 365 Cleansing Foam Aloe Face Wash Review

By Divi

Hi guys,

I am sure you must have heard of the Korean brand called ‘The Face Shop’. It’s white seed and chia seed range was a super hit. But to be honest, it was expensive. I haven’t tried either of it’s range but I did tried one of it’s face wash, it is called The Face Shop Herb Day 365 Cleansing Foam Aloe Face Wash. If you’re thinking, it’s not that expensive.

Continue reading to read my review on the product!

Price: MRP 300/- for 170ml

Skin Type: It is for all skin types.

How To Use: Massage over wet face and rinse off with lukewarm water.

Claims: Formulated with aloe extracts, this mild botanical foam cleanser leaves skin moisturized.

Ingredients:

Packaging & Texture: The packaging is pretty simple and travel friendly. It is a white colored tube with an aloe plant on it because I ordered the aloe variant. The instructions on the back are written in korean language and english as well. It has a creamy texture and is white in colour but has a slight tone of green which isn’t very noticeable sometimes. The texture is not too thick or too thin which makes it perfect for all skin types.

Experience: I was looking for a good face wash from a long time and after looking through many face washes,I came across this face wash. I was surprised to see an affordable product from a high-end brand. I purchased this face wash while a sale was going on, so I got a better deal. When I got the product, I was really impressed to see the size of the product as it was quite a huge tube than what I expected. I ordered the aloe variant. It also has various other variants to choose from. It has a mild fragrance of aloe vera in it which I really like.

Read More: Face Wash Reviews HERE

You literally need a pea-sized amount of this face wash as it foams up real good. I’ve been using this face wash for three months now and the product isn’t over yet. It still has a long way to go. It leaves my face squeaky clean and makes it glow. It removes almost any impurities from my face. I have combination skin and it doesn’t make my cheeks dry nor does it leaves my t-zone oily or shiny. It perfectly balances out everything. So if you’re looking for a good face wash,try this out. It won’t disappoint you!

Pros:

● Travel Friendly
● Easy to Use
● Affordable
● Good Quantity
● Nice Fragrance
● For all skin types
● Foams up nicely
● Remove all impurities

Cons:

● Available only online

Rating: 4.5/5

Do try this product if you’re looking for a good face wash as you won’t regret spending your money! I totally recommend it!
Best of 2017 – Makeup

Best of 2017- Makeup

Hi guys,

So I have done my 2017 skin and hair care favourites already, read HERE. Now it’s best of 2017 – makeup time 😀 I was checking all my 2017 blog posts and I have predominantly done all makeup posts, especially lipsticks and swatches. Ya, a girl needs her lipsticks and I have way too many now 😀 Hence, this post will be long, especially the lipstick category :p

Since the past two years I had mentioned in my favourites post, that I was stuck in winged liner and matte lipsticks phase. I am still stuck with matte lips but ditched the winged liner this year, for oodles of mascara and fluttery lashes with dewy, highlighted skin. I mostly use only concealer or a BB/CC Cream as base as I prefer my base to be as light as possible. I don’t like wearing foundation everyday, it’s only for makeup tutorials and special events.

See my previous years’ favourites here:

Click on the links to read reviews or see swatches..

Face:

Primer: PAC Pore Primer, Make Up For Ever Smoothing Primer

Foundation: Maybelline Fit Me Foundation, Make Up For Ever Ultra HD Foundation , Givenchy Matissime Velvet Radiant Mattifying Fluid Foundation

Loose Powder: Colorbar Loose Powder, Faces Ultime Pro Loose Powder

BB Cream: Pond’s BB Cream, Sugar Goddess of Flawless BB Cream

CC Cream: New Lakme 9 to 5 Color Transform CC Cream

Concealer: Maybelline Instant Age Rewind Concealer, Maybelline Fit Me Concealer, MAC Conceal & Correct Palette Medium Deep

Pressed Powder/Compact: Lakme 9 to 5 Primer + Matte Powder Foundation, Wet N Wild Mega Glo Contouring Palette in Caramel Toffee (yellow powder to set)

Blush: Maybelline Cheeky Glow Blush , Marks & Spencer Limited Collection Blush Damson, MAC Blush in Mocha, Makeup Geek Blushes

Contour: Wet N Wild Mega Glo Contouring Palette, Makeup Geek Contouring Powders

Bronzer: Lakme Absolute Sun Kissed Bronzer

Highlighter: PixiXAspynovard Santorini Sunset, BeccaXJaclynHill Champagne Pop, theBalm Mary-Lou-manizer

Face Palettes (for blush, contour and highlight): Faces Ultime Pro Face Palette, Sugar Cosmetics Contour De Force Palettes, PixiXMaryam Strobe & Sculpt, Strobe & Bronze Palettes

Eyes:

Eyeshadows:

Palettes: Too faced Chocolate Bar Eyeshadow CollectionLakme French Rose Palette, Sugar Blend the Rules Eyeshadow Quads, PAC Cosmetics Matte Eyeshadow Palette, PAC Sprinkle Eyeshadow Palette, PixiXItsjudytime Eyeshadow Palette, theBalm Meet Matt(e) Trimony Palette

Cream/Crayons: Faces Ultime Pro Eye Shadow CrayonColorbar Waterproof Eyeshadow Stick, Make Up For Ever Aquamatic Eyeshadow Crayon

Powder Singles: Makeup Geek Eyeshadows

Eye Liners:

Gel: L’Oreal Paris Gel Intenza Gel liners, MAC Fluidline in Blacktrack, NYX Cobalt Blue Gel Liner & Smudger

Liquid/Pen: Maybelline Colossal LinerPAC Liquid Liner Pen, Faces Ultime Pro Matte Play Eyeliner in Blue and Black

Pencils: Colourpop Creme Gel Liner in Honeydude (Nude)

Kohl/Kajal: Plum Naturstudio Kajal, MAC Modern Twist Kajal Cat’s Meow

Mascara: MAC In Extreme Dimension Mascara, Givenchy Noir Interdit Mascara, Maybelline Lash Sensational Mascara, PixiXAspyn Lower Lash Mascara

Eyebrow: Givenchy Brow Pencil & Mister Brow Filler, Make Up For Ever Pro Sculpting Brow, PAC Cosmetics Eyebrow Palette

Lips:

Lip Liners: PAC Colorlock Longlasting Lip Liners

Chubby Pencils: New Shades of Sugar Cosmetics Matte As Hell Lip Crayons, LakmexMasaba Lip Pouts, Nykaa Mattelicious Lip Crayons

Lipsticks: Sugar It’s A Pout Time Vivid Lipsticks, Sugar Plush Hour Matte Lipsticks, Lakme 9 to 5 Primer + Matte Lipsticks, Maybelline Colorsensational Creamy Matte Lipsticks, Guerlain Kiss Kiss Matte Lipsticks

Matte Liquid Lipsticks: MAC Retro Matte Liquid Lipsticks, Lakme 9 to 5 Weightless Matte Mousse, PAC Retro Matte Gloss V2.0, Wet N Wild Liquid Catsuit, Kat Von D Liquid Lipsticks (Lolita & Lolita II), Colourpop Ultra Satin Liquid Lipsticks

Tinted Lip Balms: Pixi Beauty Shea Butter Tinted Lip Balms

Nails: LYN Vegan Nail Paints, Lakme Primer + Matte Nail Paints

Makeup Setting Sprays/Mists: Pixi Glow Mist, PAC Micro Finish Makeup Fixer

Perfumes/Fragrances: CK All, Roberto Cavalli Uomo, Bvlgari Goldea The Roman Night, Roberto Cavalli Paradiso Assoluto, CK Eternity Intense

Makeup Techniques: Highlighting, Baking, Matte Lips, Dewy Skin

Tools: YBP Makeup Perfector, Sigma BrushesSedona Lace Brushes, PAC Brushes

I guess that’s all. This will be my last post for 2017.

Happy New Year guys, hope we all have a fabulous and awesome 2018!

What are your 2017 makeup favourites ? Do we share common favourites ? Let me know in the comments below.

Aspirin in Skin Care, Benefits, Uses | Aspirin Face Packs for Various Skin Types

Aspirin in Skin Care, Benefits, Uses | Aspirin Face Packs for Various Skin Types

By Sanchita

When it comes to homemade face masks for acne prone, dry, oily, combination, pigmented, normal and various other skin types, we go for the kitchen ingredients like Honey, Milk, Besan, Lemon, etc. But have you ever wondered that Aspirin which is a common medicine for headache and fever can be an excellent remedy for skin problems which will work on all the skin types? Today’s post is all about Aspirin in Skin care and it’s benefits and uses. Also Aspirin Face Masks for various skin types

WHY ASPIRIN?

Aspirin contains the compound acetyl salicylic acid, a derivative of the salicin- naturally found in plants such as the willow tree. As we are all aware of the fact that Salicylic acid is an essential ingredient for treating acne and most of the acne control products has this Salicylic acid. It has antiseptic and anti-inflammatory properties which reduces acne effectively. Thus, for oily & acne prone skin and to remove the impurities from the pores, aspirin face masks work as a wonder. The various benefits of aspirin are listed down below.

  • Aspirin deep cleanses the skin when you gently scrub it, it helps to remove the whiteheads and blackheads.
  • It has antiseptic and anti-inflammatory properties that clams down the acne prone skin and prevents itchiness and redness.
  • It is also anti-aging that helps you to tighten the skin, fills in fine lines and smoothens wrinkles.
  • Aspirin helps in renewing dead skin cells & regeneration of skin, that makes it ideal for pigmentation problems such as age spots, sun tan and dark circles.

ASPIRIN FACE MASKS FOR VARIOUS SKIN TYPES

1. FOR OILY SKIN

Take a tablespoonful of aspirin powder (crush and make the powder of 5-6 aspirin tablets) and add half a tablespoon of activated charcoal powder. Add 1tbsp of rose water and form a smooth paste. Apply with the help of a brush even of the face and wash off after 20 minutes with cold water. The aspirin along with activated charcoal powder will absorb the excess oil from the skin without drying it out.

2. FOR DRY SKIN

Take two tablespoon of curd and one tablespoon of aspirin powder and form a smooth paste. Curd works excellent for dry skin and thus apply the face pack onto the skin and leave it for 10-15 mins. Wash off with normal water and pat the skin dry. Do this on alternate days to get smooth, hydrated and glowing skin.

3. FOR COMBINATION SKIN

Combination skin type can use the aspirin face pack alone. Simply crush and make the powder of 5-6 aspirin tablets or drop them into the water to form a smooth paste. Apply on face and rinse after 15-20 minutes. Do it at least twice a week for the best results.

4. FOR ACNE PRONE SKIN

Simply crush and make the powder of 5-6 aspirin tablets, add 2 drops of tea tree oil and one table spoon of water to form a smooth paste. Apply only on the affected areas. Wash off after 15-20 minutes and do it at least thrice a week for best results. Slowly the acne will fade away. Both aspirin and tea tree oil works like magic on acne prone skin.

More skincare DIY posts: Clear, Glowing Skin | Remove Tan & Dead Skin Cells | DIY Natural SkincareTry This Overnight DIY Serum For a Translucent GlowA Daily DIY Ubtan That Will Transform Your Skin Forever!

5. FOR AGING SKIN

Crush a bunch of aspirin tablets and add it to egg white to form a smooth paste. With the help of a brush, apply on the face evenly and wait for it to get dry. Once it starts to get dry it helps to firm up the skin, fill in wrinkles and smooth out fine lines on the face. Rinse off with warm water, pat dry and moisturize instantly. Do it at least twice a week for best results.

6. FOR PIGMENTED SKIN

Take 8-9 crushed aspirin tablets and add one tablespoon of apple cider vinegar. Form a smooth paste and apply evenly on the face. Leave it on for 20 mins and wash off with cold water. Pat dry and moisturize. Doing this three times a week will give you a glowing, even toned skin

7. FOR SUN BURNT SKIN

Take 8-9 crushed aspirin tablets and add one tablespoon of raw Aloe Vera Gel (use natural one preferably) and apply the paste onto the skin evenly with the help of a brush. The Aloe Vera along with the aspirin will soothe the sun burnt skin. Rinse off with cold water after 15-20 mins and apply any serum or gel on the face.

These are the amazing and easiest aspirin face packs for various skin types. I hope you try them out.

Have you tried Aspirin Face Masks before? Your experience?

All 12 The Body Shop India Matte Lip Liquid Review, Swatches

All 12 The Body Shop India Matte Lip Liquid Review, Swatches

Hi guys,

The Body Shop launched their new makeup line, called Jacqueline’s signature line. It has cushion foundation (2 shades), 3 eyeshadow palettes and 12 matte lip liquid i.e. liquid lipsticks.

I swatched all of them for you guys..

Claims: Introducing this season’s hottest lip-color trend, Matte Lip Liquid. Our creamy Matte Lip Liquid provides intense color and a soft matte finish. The non-drying formula provides the perfect way to comfortably wear a bold matte lip this holiday season. Specially formulated to glide on effortlessly like a gloss and set with the rich creamy color and velvety touch of matte lipstick. Our liquid lipstick is long-lasting, lightweight and lusciously soft. And like all our cruelty-free makeup

MRP: Rs.695/- for 8ml

Shades Available: 12

  • Crete Carnation
  • Windsor Rose
  • Taipai Orchid
  • Nairobi Camellia
  • Paris Peony
  • Tokyo Lotus
  • Cali Gerbera
  • Goa Magnolia
  • Tahiti Hibiscus
  • Sydney Amaryllis
  • Sicily Iris
  • Mauritius Dahlia

It comes in the matching shade outer packaging, so the colors are easy to identify. It has a slanted tip applicator and easy to apply.

They have shade names of cities + flowers which is quite interesting. And they have tried to match a few shades with flowers like Orchid.

I love the fruity smell and it feels super light weight on the lips. It settles to a matte finish and is very, very comfortable. I would say this is the most comfortable liquid lipstick I have tried.

The formula reminds me of Miss Claire/NYX Soft Matte Lip Creams but these are lighter than that too. Pigmentation is good, and you need just one swipe of the deeper colors to get opaque coverage.

It doesn’t stay very long though and does not survive a complete meal. It is not completely transfer proof too. Without eating or drinking, it would stay 4-5 hours and would go away completely with food. It doesn’t leave any tint or stain behind, it goes away completely but it very easy to reapply.

But it doesn’t accentuate any dryness or lines on lips. If you love matte lipsticks but want something comfortable and non-drying, these are made for you!

I love that they have different range of shades from pinks to nudes to even berry. I would have liked more browns and berries though, I wish they add more shades in this range soon.

I picked Goa Magnolia and Tahiti Hibiscus. Also liked Mauritius Dahlia and Nairobi Camellia.

I like the price point of 695 and also the quantity is 8ml, which is more than the usual 5-6 ml in liquid lipsticks. I do recommend these!

Have you tried the new Body Shop Matte Lip Liquid?

Shaving vs. Other Methods of Hair Removal

Shaving vs. Other Methods of Hair Removal

Hi guys,

If you have been following my blog since quite some time now, you know how I am a fan of shaving and I have done quite a few posts on the correct method of shaving and on Gillette Venus razor in particular. I absolutely love it and I feel it’s one of the best razors in India currently.

A lot of you ask me why shaving, why not waxing or hair removal creams or any other method. So today I am discussing the pros and cons of all methods of hair removal and why I prefer shaving against all of those.

Shaving vs. Waxing

The most common question and the most frequently asked. The only advantage of waxing is you need to do it once in a month as the hair is uprooted from the roots and it takes time to grow back. And that also is the only disadvantage of shaving that it needs to be done once in 5-6 days. But other than this, everything else in favour of shaving. Shaving can be done anytime, anywhere and you don’t need any appointment at salon or anyone’s help in shaving. It is also much more economical and the main thing is shaving is painless! Waxing is very painful, the heat plus the pulling of hair from the roots is not easy to bear. Especially if you have sensitive skin like me, I get huge red bumps and they stay for 2 days and itch a lot! The white hair follicles from the roots come out from the pores of my skin each time and if I don’t use an astringent to close my pores, I get pus filled painful bumps from waxing and epilating. I am so thankful to be away from all that, shaving has literally changed my life (skin!)

Shaving vs. Epilating

Now the 2nd advantage of shaving was it can be done anytime, anywhere and on your own. Same goes for epilation. But the same disadvantage of uprooting hair from the roots applied to epilating too. It is again very painful and you have to do one area at a time, hence it is time consuming plus epilator covers less area and you have to bear the pain for a much longer time. I get red bumps and itchiness with epilating too, thanks to my sensitive skin. I have hardly epilated a few times in my life and it has been painful. It takes a lot of time for your body and skin to get used to epilation.

Shaving vs. Hair Removal Creams

Hair Removal creams seem like a convenient option on the face of it, but they are the worst in my opinion. I couldn’t wax due to my sensitive skin for almost 2-3 years and I used hair removal creams as I had not started shaving then. This was years ago when I was in college. I still repent that decision, the chemicals in hair removal creams are not very good for the skin and they also darken the skin. Again it’s temporary and the hair grows back in 5-6 days and you have to keep on using those creams, in turn harming the skin.

Shaving vs. Laser

Now laser is permanent and we all would love the permanent option. But it is laser hair reduction and not laser hair removal. Your hair don’t stop growing at all, they just reduce in number plus the growth process is slower. Biggest disadvantage, laser is super expensive! And you need 6-8 minimum laser sessions plus lifetime maintenance sessions. Each session should have a gap of at least a month and 2 months towards the end sessions for the hair to grow. So again it’s time consuming. Also it is painful too, as each hair follicle is burnt with the laser light.

Biggest advantage of shaving compared to all of these methods of hair removal is, it is painless! Also it is the most economical, one razor lasts you forever, you just need to buy new cartridges.

So if you compare all methods of hair removal in a crux, shaving wins hands down! Currently I have got a fracture on my right leg and I can’t go anywhere. I can’t have hairy legs as I have to show my legs to the doctors for swelling, etc. all the time and also I am pretty much in shorts as it’s more convenient and there are no chances of tripping. My Gillette Venus razor has been so helpful in this time, I have only been shaving as usual.

You can buy the Gillette Venus All in One Pack HERE which has a razor, changeable cartridges and the Satin Care Shaving Gel.

What do you feel about shaving?

OOTD: Red & White Flared Midi Dress

OOTD: Red & White Flared Midi Dress

Hi guys,

Another OOTD for you. I love midi dresses, especially these flared kinds. They look very flattering on all body types.

White and Red is one of my favourite combination, this dress had red abstract print on white base. It’s from Dainty Jewells. They have a beautiful collection of dresses, available in a large variety of sizes. Also a lot of bridesmaid dresses.

I paired it with my gold watch, tan sling and nude strappy heels. Since the dress was bright enough, I kept the accessories neutral as otherwise the colors would clash and be too loud.

Dress: Dainty Jewells
Heels: Zara
Bag, Watch: Michael Kors
Earrings: House of Tuhina

On my Lips: Maybelline Lip Gradation Red2
On my nails: Nykaa Matte Nail Paint in Black Cherry Pie

Location: The Bar Terminal
Clicked by: Rhythmic Focus

I hope you liked the outfit. Do let me know in the comments below.

How to Fight Under-Eye Discoloration Naturally?

How to Fight Under-Eye Discoloration Naturally?

By Nidhal

Eyes are the windows to one’s heart. So true! But they are a lot more than that. They are also indicators of your health. Given the kind of lifestyles we all are living, we frequently tend to cross paths with dark circles, patchiness, discoloration, puffy eyes and what not. The first stage is of denial when we see signs of these pesky woes. Conveniently and more aptly sceptically we wring up our hands in disbelief brushing aside those signs.

A few more days roll by and then those signs begin drawing unwanted attention for people point it out. That sends the ‘Oh-No- Something’s-Wrong’ flag soaring high. Petrified, we wade across over-the-counter measures and what not to allay them but more often than not, such products do not throw positive results. Disappointed, we fall into a whirlpool of pessimism. But hey, worry not. We have a treasure trove of pocket-friendly recipes-none invasive, painful or costing you an arm and a leg at your disposal that’ll leave you heaving a sigh of respite.

1. MALAI/MILK CREAM- Milk has great lightening abilities for the skin and can be a very affordable option for dealing with dark circles under the eyes, which can have great results. Milk cream is a derivative of milk. Being a powerhouse of fats, malai is what you need if you suffer from under-eye discoloration.

PROCEDURE- Simply dab and massage a tbsp. of fresh milk cream using your ring finger (for it is the gentlest in massaging) carefully on your under-eye area. Do not let it enter your eyes. If it does, wash off immediately. That’s it. Sleep with it. In the morning, you can wash it off. Let it work its magic overnight. Continue every night for at least a week. It shows results and how! I vouch for this method provided it is followed painstakingly and regularly. And yes, it softens the area too. Double-whammy, did I hear you say that?

2. ALMOND OIL- Here comes the weapon that has been relied upon since times immemorial to banish those dark circles- Almond oil. Shouldn’t there have been drumrolls in the background as I introduced it?

Coming to its virtues, almond oil is anti-inflammatory, thus it reduces puffy bags under the eyes and dark circles. It is a good source of vitamin K, which improves clotting, reducing discoloration under the eyes.

PROCEDURE- Application is simple. Simply slather and massage the under-eye area with almond oil (few drops) every night dedicatedly without fail for at least a fortnight. Sleep with it and let your skin repair itself overnight.

3. EXTRA VIRGIN OLIVE OIL- If almond oil has made an appearance on this list, can EVOO (Extra virgin olive oil) stay far behind? EVOO is the best grade of olive oil for it is least processed and contains maximum nutrition. It comes in glass bottles and is higher than all other variants. It works wonders in allaying wrinkles. Ladies approaching their twilight years can still shed a few years of age off their skin with the help of this wonder oil.

PROCEDURE- Massage a few drops of it on your under-eye area. Please note that massaging is important. That is what matters else the oil will merely sit on your skin and not nourish it the way you want to. Do this every night for 5 minutes gently for at least a fortnight. You will be spellbound with the positive turn of events.

4. GREEN TEA BAGS- Packed with a number of antioxidants, green tea helps banish dark circles and keeps them at bay for as long as you continue sipping (or as I do, gulping) it.

PROCEDURE- Put two green tea bags in the refrigerator for at least an hour. After that, keep them on your eyes. It’s alright if it’s not entirely on your under-eyes. It nourishes eyelashes too so, you have the best of both worlds there.

5. CUCUMBER JUICE- Not only is the cool cucumber (you surely would have heard the phrase ‘as cool as a cucumber’) rich in vitamins and minerals which helps to hydrate, nourish and tone skin, but also brighten the under eye area, so that you can say ‘good bye’ to those pesky dark circles permanently. What needs to be done?

PROCEDURE- Mince a cucumber into a few slices. Actually, two would do. Freeze them for half an hour and then, keep them on your eyes. Bid farewell to all those woes pertaining to your under-eye area.

Editor’s Note: Those are fab tips Nidhal. I swear by almond oil, I am currently using the Cold Pressed Sweet Almond Oil and 3 drops are more than enough! Also just wanted to add, be careful when using the oil, make sure you don’t go too close to the eyes or it doesn’t enter inside, it kind of blurs vision for the entire night :/ Also I recommend the Rogan Badam Shirin, it’s the most economical and easily available option when it comes to purity.

Image Sources: 1,2,3,4,5

Have you tried any of these for under-eye discoloration? What do you swear by?

How To Do A Simple Face Clean-Up At Home

How To Do A Simple Face Clean-Up At Home

Hi guys,

I don’t generally go to salons for facials and clean ups, I prefer taking care of my skin at home and follow the basic skin care routine regularly. If you spend even 5-10 minutes on your skin daily and the scrub/mask routine once/twice a week, you won’t need any fancy or expensive salon facials/clean ups.

Now a clean-up is important coz sometimes the blackheads and whiteheads are not really visible but they do develop when the pores are blocked or there is dirt in the pores which is not cleaned regularly.

Here is how I do a mini clean-up at home:

1. Wash your face with a face wash. My Holy Grail is the Himalaya Herbals Purifying Neem face wash.

2. Cleanse your face with a milk based cleanser. Now there are quite a few options available, you can also try the Himalaya Herbals Refreshing Cleansing Milk. Massage for a minute to two and wipe it off with a damp cotton ball

3. Take steam on the face. If you don’t have a steam machine, just boil some water and bend your face over it covering with a towel. It will do the job equally well.

4. Extract comedones, either use cotton on both of your hands to press the skin and extract it or use a blackhead extractor for deep rooted blackheads. You get it for about 50-60 rupees. Just sanitise and clean it before using and even after using.

5. Scrub your face. I use the Himalaya Herbals Purifying Neem Scrub when I am breaking out or have 1-2 acne or the Himalaya Herbals Gentle Exfoliating Walnut Scrub if my skin is a little dry or in winters. Scrub for a good 2-3 minutes concentrating more on nose, forehead, chin, sides of nose, etc. Wipe it all off with a damp cotton ball.

6. Toner. You can either use rose water or cucumber water or any alcohol free toner to close the pores. It is very important to close the pores which have opened with the steam.

7. Follow it up with a face pack. Now again I would go with either the Himalaya Herbals Purifying Neem Face Pack if I have acne or the Himalaya Herbals Fairness Kesar Face Pack if I want to get rid of tan. Keep it for 10-15 minutes and also use cotton balls soaked in rose water over the eyes and just relax. Take it all off with a damp cotton ball. Wash your face with water if you feel like.

8. Moisturize your face with your regular moisturizer.

9. Apply a sunscreen/sunblock

That’s it, you are done. This whole procedure will take about 30 minutes including the face pack. You can do it once a week on a Saturday or Sunday, you can spend at least 30 minutes in a week over your skin, if not, once in two weeks is a must! Also if you do not do it regularly, the whiteheads and blackheads will not be extracted, the skin won’t be exfoliated. Dead skin cells will form a layer and the blackheads will turn to acne.

Regular skin care is important even if you have good skin, to maintain it. Do not take your skin for granted. Your skin gets regenerated every 21 days, so at least follow this simple clean-up at home once every 2 weeks i.e. 14 days.

Few points to remember:

1. Always use products according to your skin type or how your skin is behaving during that time.

2. Do not be harsh on your skin, do not scrub vigorously or over exfoliate.

3. Always end with a sun block/sunscreen even if you are not stepping out

There are a lot of products available in the market if you do not have extra time to DIY at home. I like Himalaya Herbals products and have been using them since my college days. They are affordable and easily available.

You can check out Himalaya Herbals on Facebook HERE and on twitter HERE and also more from their Face Care Range HERE

How do you do a clean-up at home?

What’s in My Makeup Pouch?

What’s in My Makeup Pouch? (Makeup On The Go)

By Linda

Hi everyone,

Today I will be talking about the makeup products I carry everyday along with me. Yes every day!!!!!. As I only prefer to allot 5 mins for a simple and natural makeup. In case of parties / events or other functions obviously the products would be different and it won’t be relevant to today’s post.

As I’m always on a run , be it for work/ meeting with friends, in which case I mostly do my makeup either in my car while I’m commuting or head straight to a decent ladies common room ..yeah that kind of a crazy person I am. Rather than digging into my bag for each product or forgetting it at home I prefer carrying these few products in a pouch, where ever I go. Let’s admit one thing that makeup last for at least 4-5 hours depending on the weather conditions or your skin type. It’s always better to carry this pouch for retouches. And I don’t want load my bag with all unwanted makeup that I don’t use daily.

I did mention it’s a makeup pouch , since a pouch can carry minimal but most important things that serves our purpose. Secondly it’s light weight and travel friendly.

So let’s get to the point and find out what’s in my pouch

1. Mac Studio Fix Foundation plus Powder [Shade: NC 41]

This is a highly recommended product. Firstly it functions as a foundation plus powder. Secondly within the container it has a sponge for easy application of the product and a mirror build in (you need not carry an extra mirror).So now you can imagine how multipurpose this product is . I will be writing a detailed review of this product soon. Keep watching!!!

2. Maybelline Dream Sun Triple Bronzing powder [Shade: 02 Brune]

This is another all-time favorite product of mine. The detailed review of this product is HERE. As I mentioned in the review this a multipurpose product. It can be used as Bronzer, for contouring and highlighting ,and at times as a blush as well. Trust me these 3 shades can do wonders on your skin.

3. A Blush by Rimmel London [Shade 190 Coral]

What I like about this blush it gives you a flushed natural look, as it has tiny amount of shimmer. Also it is light weight and smaller in size.

4. Bourjois Kohl & Contour Eye Pencil (Review HERE)

A water proof and smudge proof eye pencil is all you need. And a sharpner along with it is an add on.

5. Perfume vial (Milano by PRADA)

This vial always comes handy to revive the freshness of your fragrance you already applied. All you need is to invert the vial on your finger tip and dab it behind your ears and wrist, and then you are are all set to go.

6. Lipstick /Lip balm

It’s always advisable to carry a lipstick of a neutral shade (browns) and cool toned (shades of pink and mauve) lipstick of your choice. I carry a neutral lipstick from Mac Shade Whirl which is reviewed HERE

7. Bourjois Volume Glamour MAX definition Mascara

Any look is incomplete without a mascara. The wand has fine and short bristles that coats your eyelashes giving a voluminous look.

8. Essence Eye Pencil & Eyeshadow [Shade 05 Cute Copper]

This is a neutral bronze pencil eye shadow, creamy formula, easy to apply. You don’t even need a brush. Easy to blend with your fingertips.

I carry all my products in a light and small-medium size pouch I picked from H & M.This is a zipper pouch in a metallic color. Easy to carry where ever you go and fits into any size of bags.

Believe me all these items easily fits into a small pouch only try to select items that are multipurpose, light weight and travel friendly.

Hope you enjoyed reading this post…

Editor’s Note: Ya I guess these things are enough, I would just add an eyebrow pencil and highlighter for me 😀

What’s in your makeup pouch?

Faces Cosmetics Ultime Pro Mineral Loose Powder Review, Swatches

Faces Cosmetics Ultime Pro Mineral Loose Powder Review, Swatches

Hey guys,

I have been using the new Faces Ultime Pro Mineral Loose Powder since quite some time now, they have revamped the packaging and now it comes in this all new, fancy black and silver packaging.

What the Company claims: FACES Mineral Loose Powder is an innovative non-comedogenic formulation which offers protection from harmful UV radiation and imparts a silky, irresistible touch to facial skin. It does not clog pores and is hypoallergenic. It comes with a unique, spill-proof, easy-to-use applicator. Suitable for light to medium coverage on all skin types.

Shades Available: (Lightest to darkest)

  • Natural Beige
  • Ivory Beige
  • Sand Beige
  • Honey Beige
  • Golden Beige

Ingredients:

MRP: Rs.699/- for 82g (BUY HERE)

To start with the packaging, I absolutely love this new packaging. It does not spill off extra powder as only the required quantity comes off the sieve. And the sponge picks up the product well, which you can directly dab on the face, wherever required.

I have the shades 02 Ivory Beige and 03 Sand Beige. Now 03 Sand Beige is a good match for me which is the mid shade, Ivory Shade is a little lighter which makes it perfect to set the under eye concealer and for baking under the eyes and below the contour.

The sieve comes covered with a thick white paper which is supposed to be peeled off and later you can directly cover it with a sponge or keep the paper if you don’t want the powder to be on the sponge, when not using.

The powder is extremely soft and silky and very finely milled. I love the smooth finish and texture, and it glides on well on the skin. It keeps the skin matte for a good few hours and would also prevent your under eye concealer from creasing and settling into the fine lines.

This powder has some coverage, but it would be a little less than the normal compact powder, so don’t expect too much coverage from this. This is basically a setting powder which you have to use to keep your base makeup in place and not melt or transfer or slide off.

Left: Sand Beige, Right: Ivory Beige

I also like the fact that there are 5 shades available. It is a little on the expensive side but the quantity is quite good. Faces India is also a cruelty free brand and doesn’t test on animals, if you use only cruelty free brands.

Overall I would say, I definitely like it and recommend it, but as a loose setting powder, this won’t and cannot replace your compact powder, especially if you are looking for coverage. However if you use your compact powder as setting powder, you can try this. I am sure you will like it.

Have you tried the new Faces Ultime Pro Mineral Loose Powders yet?